This post might be created with help from AI tools and carefully reviewed by a human (Anthor Kumar Das). For more on how we use AI on this site, check out our Editorial Policy. This post contains affiliate links. We may earn a small commission at no extra cost to you. Learn more.
How to Mark a Queen Bee (with Colour Code Chart by Year)
When it comes to the case of how to mark a queen bee, my rule is simple. I use my fingertips to hold her legs and one of her wings, then gently mark her on the thorax with the marker. However, during my first queen marking, I was not that confident enough to do the same.
When I marked a queen bee for the first time, I used a queen catcher clips to safely catch her. Then used some other tools comes in a complete package for marking queen bees.
That’s what I am going to share with you in this article.
I will cover my most favorite way of marking a queen, along with popular methods available for beekeepers of all ages. I will also share the queen bee colour code chart by year and mistakes to avoid when marking a queen bee.

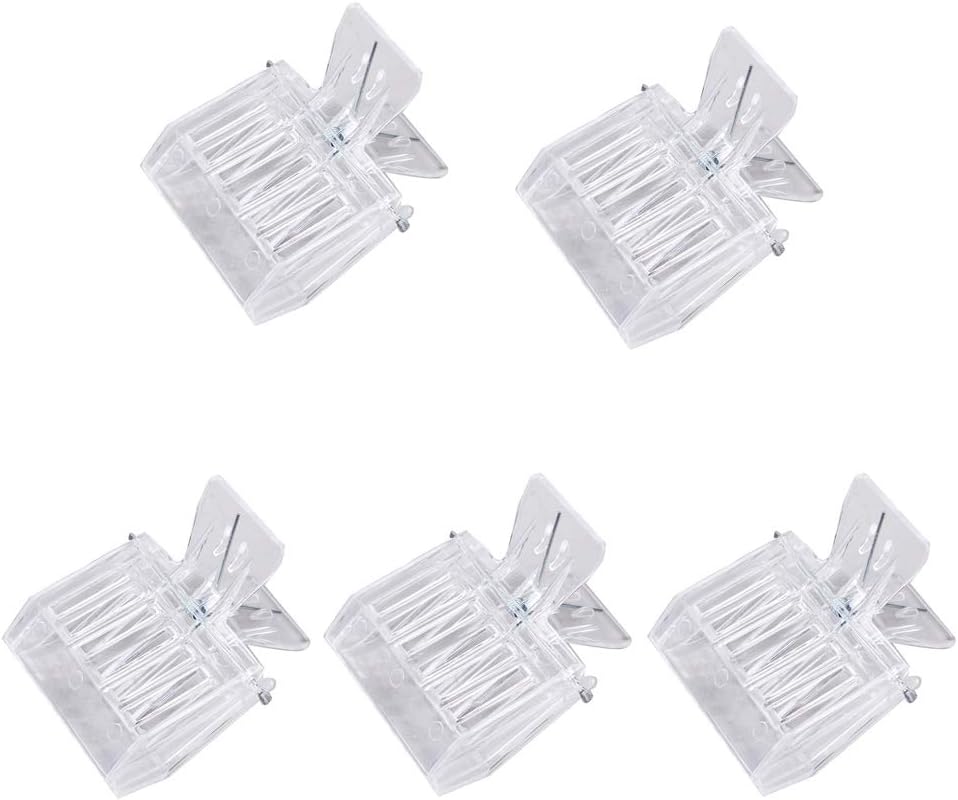
Queen Bee Marking Kit – 5 Color Marker Pens, 2 Marking Bottles & 2 Queen Cages
Everything you need in one kit – includes all 5 international color code markers, 2 marking bottles for safe handling, and 2 queen cages for holding her while the mark dries.
See Price on Amazon →
Why Mark a Queen Bee?
Marking a queen bee is a great hive management technique used by beekeepers worldwide. Marking a queen not just helps you to identify her easily, but also helps you to know her age and the colony’s health.
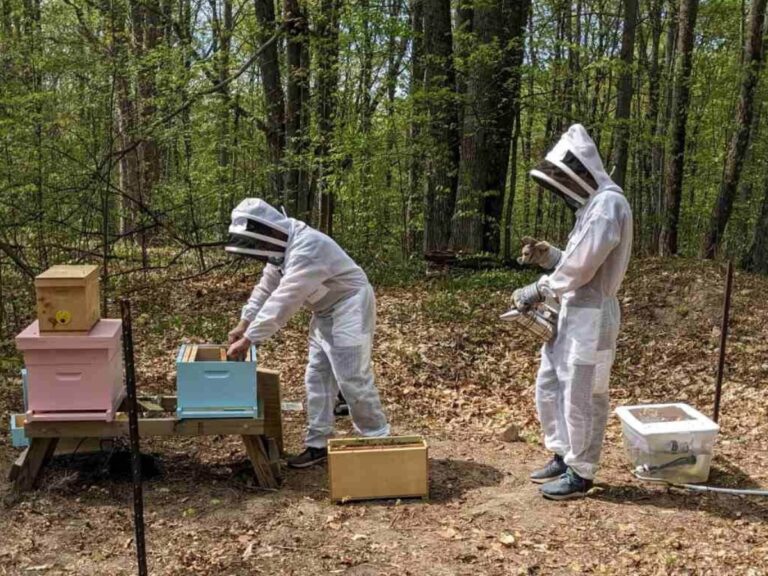
Thus, it is a good practice to have a marked queen from day 1 of getting the nuc of bees or the colony. A marked queen helps you to keep data tracking of the overall colony productivity.
Having a marked queen helps you in many ways.
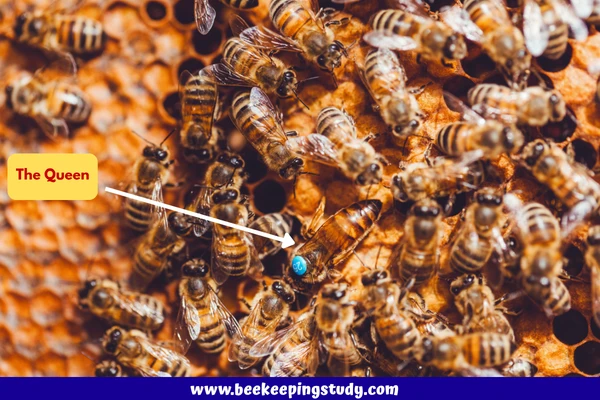
- Each time you inspect your beehive, you can easily confirm her presence by identifying the bee with a colored mark on the thorax. This helps you to tell whether the colony is queen-right or not.
- Helps you to decide when to replace the old queen with the new one.
- By tracking the performance of the marked queen bee, you can make important decisions on what action to take to improve the colony productivity, such as honey harvest, brood rearing, and more.
- Helps to identify the queen’s age, thus helping you to know when you need a new queen for the colony.
- A marked queen will help you to notice when she needs your help.
- A marked queen allows you to easily identify when to take necessary action against any difficulties the colony is facing.
- A marked queen also helps you to know early if the workers replaced the old queen with a new virgin queen.
Note: If you notice lot of dead bees on the ground, or any other symptoms like too much aggressive bees, reading the queen’s state will help you to identify the suspected cause. This helps you to ensure having a thriving and healthy colony.
How to Mark a Queen Bee?
Marking a queen bee requires practice and skill sets. Because the queen is the only reproductive member of the hive. If you accidentally kill her, you have to requeen the hive quickly. Otherwise, you will lose the colony.
This is why this requires more and more practice
Practice on The Drones First Before Marking the Real Queen
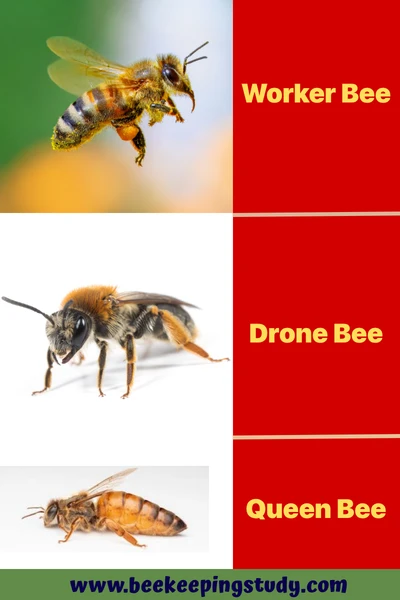
The drones and the queen look almost similar. The queen is the largest, and the drones are larger than the workers and a bit shorter than the queen.
Before you mark your queen, you have to practice it several times on the drone bees. Because if you kill one or two drones during practice, it won’t impact your colony.
But if you lose the queen during marking, it will be costly. In fact, it will be dangerous as the colony will be aggressive and might swarm away.
This is why it is always recommended, whatever method you are following to mark your queen, practice it on drone bees first. When you successfully marked several drone bees and gained confident apply it to the queen bee.
Will it Be Confusing When you Have Both Marked Queen and Marked Drones?
To avoid confusion, use a different color for the drones than your marking color for the queen. You can use any other color that you will never use for marking a queen.
Example: Purple, Beige, or Maroon.
This helps you to avoid confusion and easily identify the queen bee. Also, the drones have a very short lifecycle.
Important Note: The drones won’t be present in the colony after the next breeding cycle. As you know, the existing drones will die after one queen mating flight.
Preparations Before Marking the Queen
Marking a queen bee is not just taking her out of the hive and setting a dot with the marker on her thorax. You must go for marking when everything is nice and she is ready to be marked.
Here are the things you have to ensure before marking the queen.
- Choose an ideal hive inspection time before opening the hive.
- Close the hive and try again after a few days if you can’t identify the queen within 5 mins of starting your hive inspection.
- Avoid opening a beehive during harsh environments and times when bees don’t want to come out of the hives.
- If you see that bees are too aggressive, don’t go for queen marking. Give them a few more days and try again.
- Be gentle when holding her for marking. Don’t squeeze her.
- Practice more and more on drones before marking her.
3 Steps to Mark Your Queen Bee
No matter which method you are using to mark your queen, this will require only 3 steps.
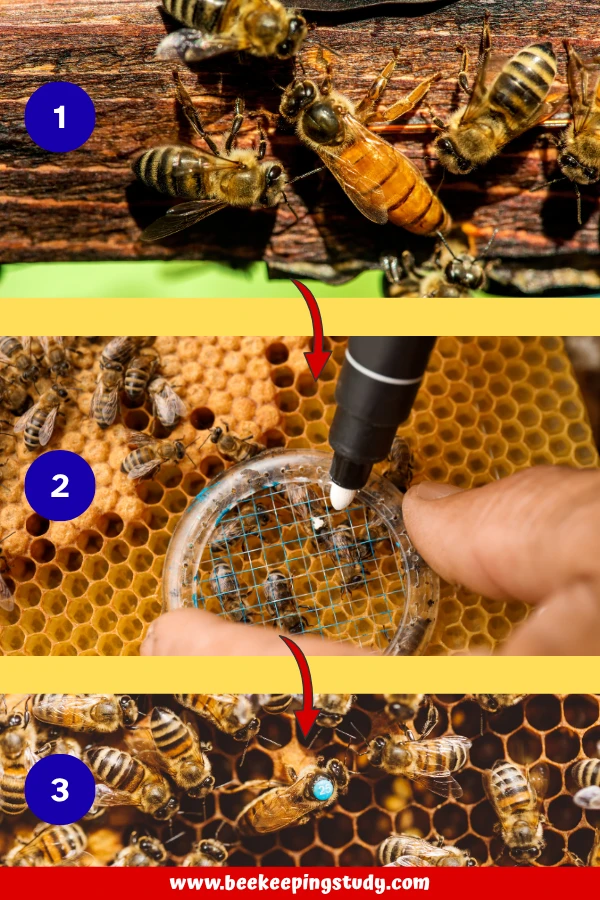
Step-1: Identify the queen
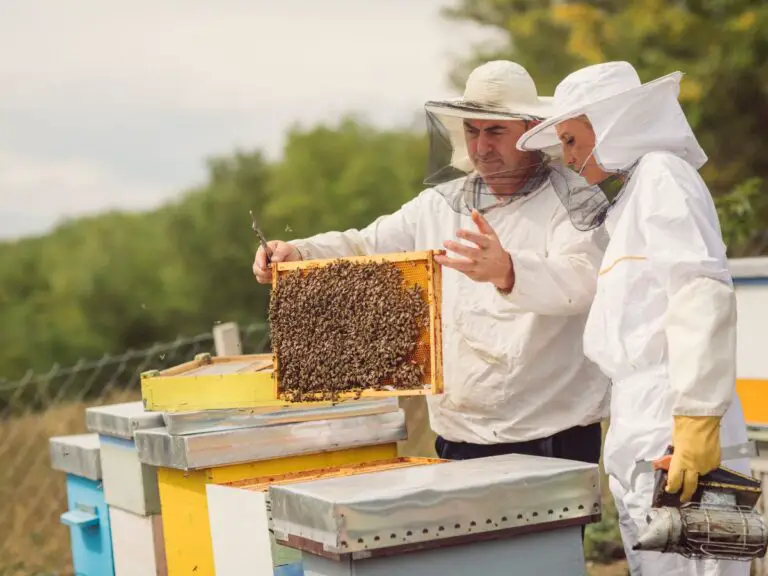
It is very crucial because you must have queen bee identification skills. Safe and secure! If you spend too much time identifying her, she might try to hide on the opposite side of the frame.
If you make it wrong, you won’t be able to spot her properly. Also, if you notice bees are very aggressive, they might not like the interruption. Thus, avoid queen marking on that day.
In such cases, close the hive and try again next week.
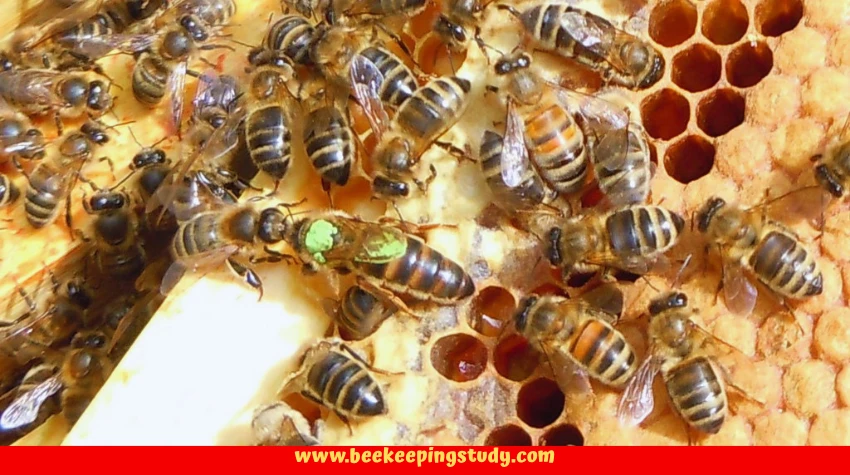
Tricks to find the queen: Inspect the frames with heavy bee trafiic mostly with capped honey and capped broods and heavy brood bee traffic. Also, look for multiple worker bees facing towards a large bee (this is your queen) in a circular shape.
Step-2: Mark the Queen
After you identify the queen, you have to immobilize her. After immobilizing her, you can mark her. For immobilizing the queen, you can use several techniques.
- Using your fingertips only.
- Using a queen catcher.
- Using a push-in cage.
- Using a Press-in cage.
After catching and immobilizing her, you have to mark her with 2-4 shots. This is why you have to keep practicing on the drone bees before marking the actual queen.
Use your marker and mark on the center of the thorax of the queen. Make 2-4 noticeable dots at the center of the thorax of the queen.
Tools You Need to Mark Your Queen

Uni Posca Fine Point Acrylic Paint Markers – 8 Pack
Non-toxic, water-based markers – includes all queen marking colors and more
Queen Bee Catcher Clips – 5 Pcs Transparent Plastic Cages
Safely capture and hold the queen on the frame for marking

Toddmomy Queen Marking Bottle with Long Plunger
The safest method – push-in tube with foam plunger for gentle queen marking
Step-3: Remove Her Back to The Hive
After you successfully mark your queen, give her a bit of time before releasing her back to the hive. You can keep the queen in a cage for up to 2 hours before releasing her back to the hive.
Let the mark dry out; this usually takes a few minutes to an hour. Then release the queen gently to the frame with a combination of uncapped and capped broods, capped honey, and lots of worker bees as well.
Queen Bee Color Code
You can mark your queen with any color if you can remember that. But there is an international color code standard for marking the queen based on her birth year’s last digit. It is a 5-year rotating system based on the last digit of the year the queen was born or introduced to the hive.
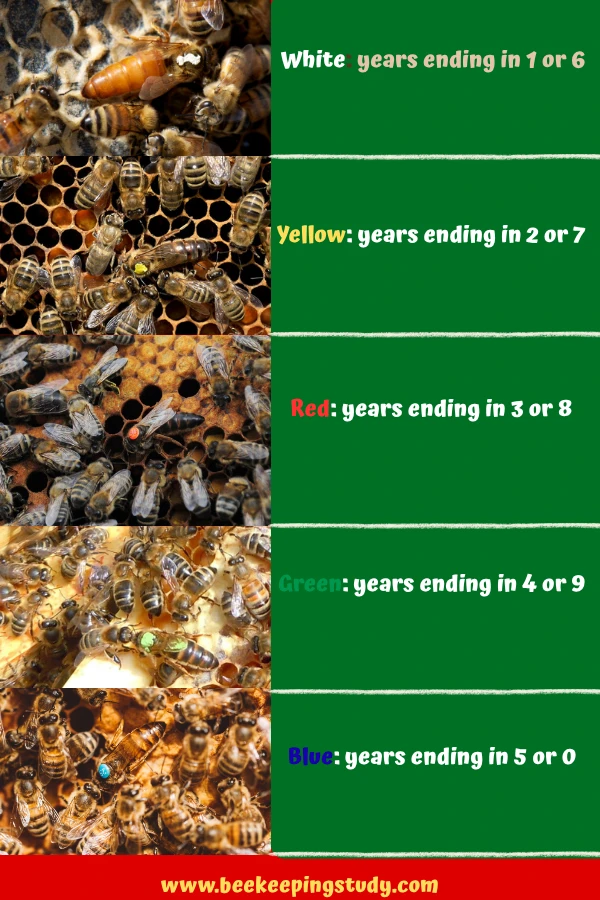
Here are the rules to decide which color to use for marking your queen.
- White: years ending in 1 or 6.
- Yellow: years ending in 2 or 7.
- Red: years ending in 3 or 8.
- Green: years ending in 4 or 9.
- Blue: years ending in 5 or 0.
Marking the queen with the standard color code helps us to know the age of the queen easily.
Mnemonic to remember the order: “Will You Raise Good Bees?”
The Five Colors Explained
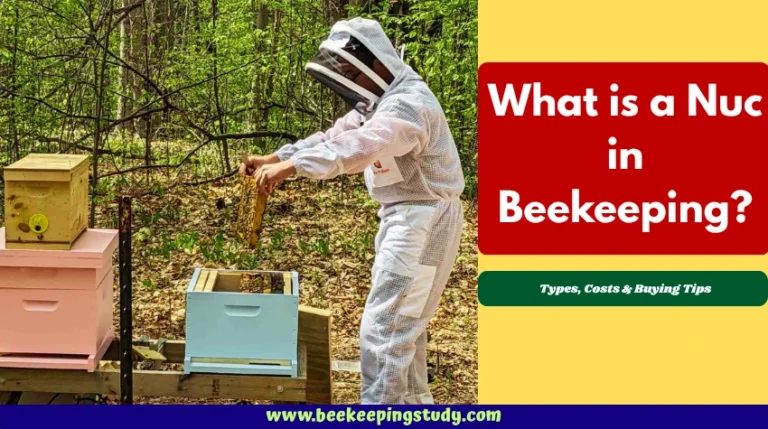
Are You Planning to Purchase a Nuc This Year?
When purchasing a nuc in 2026, the queen should be marked white if she was born this year, or blue if she is from 2025 (overwintered). If you see any other colour, or no mark at all, make sure to ask the seller why.
A mismatched colour can indicate the colony silently replaced its queen through supersedure, or that the seller is not following the international standard.
What Color to Choose for Your Queen Marking
My recommendation is to use the international standard. Whether you are a commercial beekeeper or a hobbyist beekeeper, the international standard queen bee color code is suitable for all beekeepers. Here is a year-by-year breakdown of identifying color to mark a queen.
Quick-Reference Year Table (2020–2031)
3 Popular Methods to Mark a Queen Bee
There are 3 popular methods that most beekeepers use to mark a queen bee.
- With just a marker and using fingertips.
- Using a queen catcher clip.
- Using a push-in cage.
How to Mark a Queen Bee Using Fingertips Only
This method is mostly used by expert beekeepers. I learned this after a few years of gaining beekeeping experience.
Thus, this method is recommended for expert beekeepers who have the skills to take care of the queen and overall beehive management. For beginners, please proceed with caution or follow other methods.

Here is the step-by-step method.
- First, identify your queen.
- Wait for the right time to hold her with your fingertips gently. Don’t rush, otherwise you may squeeze her.
- When she is gentle, and you are confident, gently pull her out of the hive by holding one of her wings.
- Now, try to hold her legs and one wing with your fingertips gently. Make sure not to go too fast or hard, otherwise her wing may be torn apart.
- Gently make a circle on her thorax with your marker of the correct color based on the year. You can apply 3-4 dots to make a visible large circular marking on her thorax.
- Keep her in a cage for a few minutes if she is laying.
- Release her back to the hive when the color is dry.
Important Rule: If the queen is virgin, release her instantly after successfully marking. If the queen is old or actively laying you can wait for few minutes to an hour before releasing her back to the hive. This rule is applicable for all these 3 queen marking techniques.

Uni Posca Extra Fine Marker (White) – Perfect for Precise Queen Marking
Extra fine tip for a clean, precise dot on the queen’s thorax – non-toxic, water-based acrylic ink. White is the international standard color for queens born or introduced in 2026.
See Price on Amazon →
How to Mark a Queen Bee Using a Queen Catcher Clip
A queen catcher clip is like a hair clip, usually made with a steel or plastic body. I prefer the steel one to use for a long. However, you can go with the plastic options as well if you prefer a budget-friendly option.
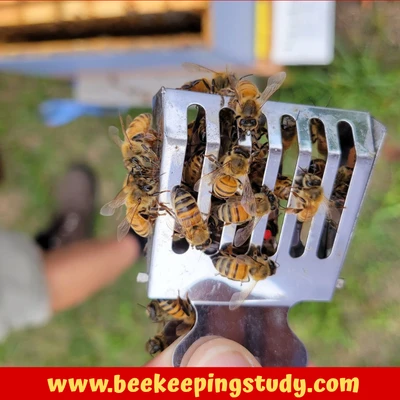
Here is how you should use a queen catcher clip to mark a queen bee.
- After identifying the queen on the frame, squeeze the spring-loaded prongs to open the clip and gently place the catcher over the comb so that the queen is positioned between the two halves of the clip.
- Slowly move the catcher up and down along the frame so that the smaller worker bees escape through the excluder slats, and only the queen is inside.
- Once the queen is safely inside, release the spring-loaded prongs to close the clip and lock her in place.
- With the queen held inside the catcher, position her so that her thorax is accessible through the slats. Using your marking pen, apply 2–3 dots of paint on her thorax to create a clear, visible mark.
- After successfully marking her, squeeze the spring-loaded prongs once again to open the clip and gently release her back to the frame.

Together-life Stainless Steel Queen Bee Clips Cage Catcher – 10 Pack
Professional stainless steel queen clips with spring-loaded prongs – safely catch and hold the queen on the frame while workers escape through the excluder slats.
See Price on Amazon →
How to Mark a Queen Bee Using a Push-In Cage
The push-in cage is a transparent plastic tube, cylindrical and slightly elongated. It is open at one end and capped with a mesh screen (marking grid) at the other end.
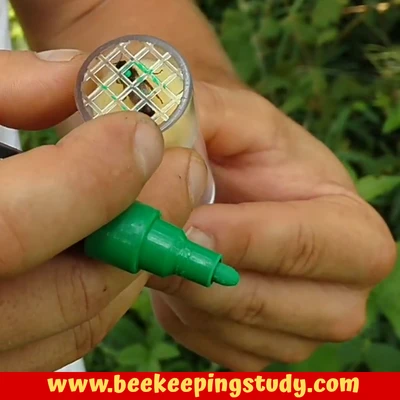
The mesh has small holes through which you can insert a marking pen to reach the queen’s thorax.
Inside the tube sits a soft foam-tipped plunger, a plastic rod well known as plunger rod with a cushioned sponge pad attached at the top. This plunger slides up and down inside the tube, allowing you to gently push the queen toward the mesh end without injuring her.
Here is how you can mark a queen bee using a push-in cage.
- Gently place the open end of the tube in front of the queen and allow her to walk inside the plastic tube on her own.
- Once the queen is inside the tube, insert the plunger and slowly, very carefully push the foam tip upward to guide her gently toward the mesh screen at the top.
- If the queen has flipped upside down, pull the plunger back down slightly and give the tube a soft, light puff of air so that she lands right-side up on top of the foam pad.
- Then, very carefully push the plunger upward again, bringing the queen all the way to the mesh screen at the top, positioning her thorax as close to the mesh holes as possible.
- Make sure not to apply too much pressure or squeeze her. She just needs to be held gently against the mesh wall, close enough that your marking pen can reach her thorax through the holes.
- With the marker, gently apply 2–3 dots of paint on her thorax to create a clear, visible mark.
- After successful marking, release her back into the hive by pulling the plunger back down and placing the open end of the tube facing down onto the frame.
- Allow the queen to walk out of the tube and onto the frame. Once she is safely out and back among her bees, remove the tube and close the hive.
Among all these 3 queen bee marking methods, this one is the safest method. However, still it requires more and more practice and carefulness.

Queen Bee Marking Tube with Soft Plunger – Beekeeping Tool Kit
Transparent tube with foam-tipped plunger – gently guides the queen to the mesh screen for safe, hands-free marking through the grid holes. Ideal for beginners.
See Price on Amazon →
Mistakes to Avoid When Marking a Queen Bee
Marking a queen bee is a valuable skill for beekeepers. But not everyone can do it so easily. You have to practice more and more to mark a queen successfully and perfectly without causing any damage to her.
Here are some tips you should keep in mind. These are tips, and you can consider mistakes that you shouldn’t make.
- Opening Hive when Shouldn’t: Bees don’t like inspection always. They don’t like some environmental conditions and times. Thus, it is always recommended not to open a beehive under some harsh conditions. So, learn about the right hive inspection timing and interrupt them only when the condition is bee-friendly.
- Choosing Any Random Color: You might use your own color pattern, but this is not a standard practice. Sometimes worker bees understand patterns of color marking on the queen bee. Thus, it is always recommended to choose the correct color based on the queen’s age and the current year.
- Marking Her When The Colony is Aggressive: If you see bees showing unusual aggressiveness, that means there is some issue with the colony. Never think of marking the queen under such conditions. Identify if there is any issue, then wait for a few days and try again.
- Going for Queen Marking Without Practice: It is always recommended to practice the marking on drone bees several times before marking the queen. When you are about to mark your queen, first mark several drone bees, then go for the queen bee marking if you are confident enough.
Frequently Asked Questions
What can I use to mark a queen bee?
The most common tool used for queen bee marking is a non-toxic, water-based, acrylic marker. You can use any non-toxic paint marker with the correct color code to mark a queen bee.
What color to mark a bee queen?
White for the year ending in 1 or 6. Similarly, Yellow for 2 or 7, Red for 3 or 8, Green for 4 or 9, and Blue for 5 or 0.