This post might be created with help from AI tools and carefully reviewed by a human (Anthor Kumar Das). For more on how we use AI on this site, check out our Editorial Policy. This post contains affiliate links. We may earn a small commission at no extra cost to you. Learn more.
How To Make A Beehive Quilt Box [Moisture Control For Bees]
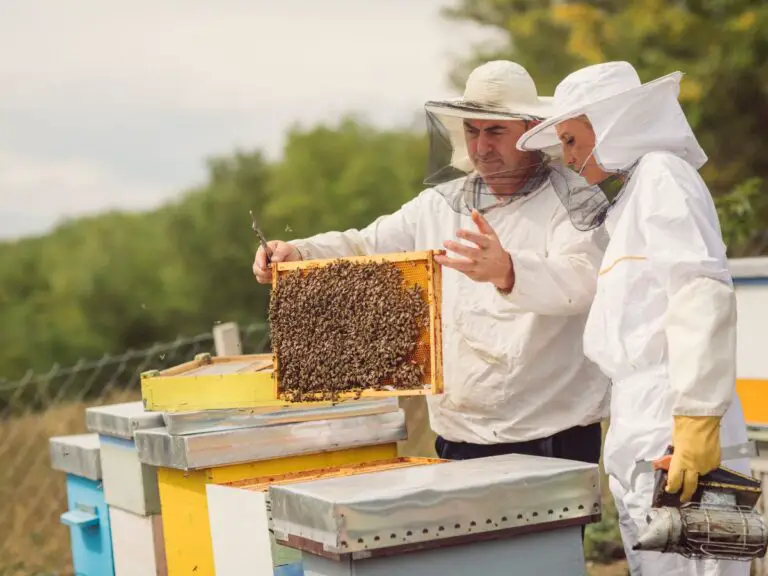
Ensuring safety for bees in every season is the first priority of a beekeeper. Bees are very sensitive to the atmosphere and temperature. Several factors of the atmosphere affect the growth and health of a bee colony. Controlling moisture during winter is one of them.
There are so many ways of controlling moisture in a hive in winter. Creating a beehive quilt box is one of them.
It is tough to make any sensitive thing like a quilt box without any guide! Right?
I have also face the same trouble when I was making my first quilt box for my bees. Then I become an expert in making a perfect beehive quilt box.
In this post, I am going to guide you on how to make a beehive quilt box.
Everything I am going to share with you is how I made my own quilt box. Also, I will share with you how I am actually using it. So, you can get ideas from me and make one for your beehive too.

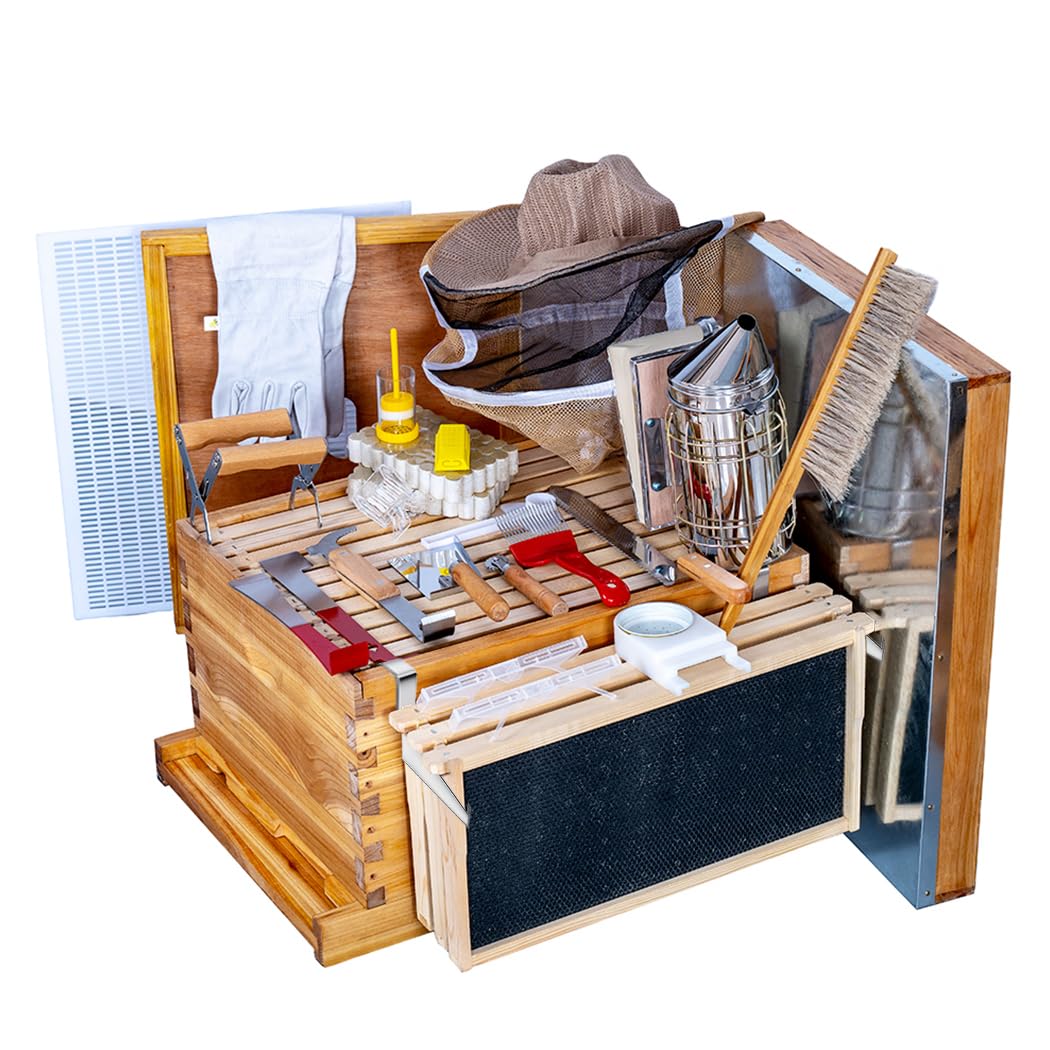
Thyle 10 Frame Quilt Box & Candy Board Combo
Fully assembled quilt box with candy board — a ready-made winter preparation combo for moisture control and bee feeding.
See Price on Amazon →
Importance Of Moisture Control For Your Beehive
Extra moisture in a beehive is a serious problem. Because if your beehive got uncontrolled moisture, it will be a dangerous alarm for your colony.
Because bees can’t live in extra moisture. Your colony can be attacked by several diseases which can destroy your colony.
If your colony has brood bees then they can also die because of extra moisture.
So, in order to save your colony and for the sake of successful beekeeping, you must be serious about controlling extra moisture.
In the first year of my beekeeping, I haven’t taken any steps for moisture control for my colonies. After a few days, I got shocked by witnessing that a lot of my bees have died. My area usually is very cold during December And January.
My one colony is almost destroyed completely. It makes me very disappointed. Then I have taken steps against extra moisture in my beehives.
It can happen to you too if you haven’t taken any steps during winter.
We all know that bees are always working to keep their colony safe in every season. Bees are continuously producing heat to control the moisture of their hive. As a beekeeper, we only can help them to make their colony safe and healthy.
In every season bees are trying to control the moisture of the hive on their own. They try the exact same thing in the winter. But while trying to control moisture on their own they produce a lot of carbon dioxide. Also, they produce a vapor of water that can be risen up to the top of the beehive.
After rising to the top of the beehive the water molecule will mix up together. Then the water will be driven drop to your bees and brood bees. Which could be a huge threat to your bees.
This is why every beekeeper must winterize their hive before winter. Adding any moisture-controlling board like a quilt board can be one of the steps.
What Is A Beehive Quilt Box?
A quilt box is a small box that has the ability to absorb moisture. It is usually made with burlap and wood chips placed within a square-shaped spacer which is made of wood.
The quilt box is similar to a moisture board. You can use this stuff as a better alternative to a moisture board.
Quilt boxes have the ability to absorb extra moisture from the atmosphere and hold it. It has the ability to pass moisture from the air to the hive when necessary.
So, it will actually work as a controller of allowing moisture to enter or not inside the beehive. Thus it always keeps your bees dry.
What Is The Purpose Of The Quilt Box?
A quilt box is needed when the weather is too cold. This means the atmosphere contains extra moisture than the need inside a beehive. The quilt box won’t pass the extra moisture inside the beehive. Ultimately your bees remain dry and safe.
A quilt box doesn’t need for every beekeeper. If you are living in a comparatively colder region, then a quilt box might be needed. This will help your bees keep dry and safe from excessive cold.
Why Quilt Box Is Better Than A Normal Moisture Board?
Moisture board and quilt box both are used to control extra moisture in the winter. If want to know about moisture boards and how you can create a moisture board you can check this article.
A comparison between a quilt box and a moisture board is given below.
| Quilt Box | Moisture Board |
| 1) Quilt Board used in a quilt box is easier to build. Because it doesn’t require too much measurement. | 1) It has complex construction. Also, require complex measurement. |
| 2) It can hold moisture for the entire season. | 2) It can not hold moisture for more than 1 month. |
| 3) Require fewer check-ups. | 3) Moisture board needed to be checked every 3 to 4 weeks. |
| 4) Sometimes It may not be able to hold very dense moisture. | 4) It can absorb excessively high dense moisture. |
| 5) It can be used in both winter and summer. | 5) It can be used only during winter. |
| 6) It works as a regulator. So, it can hold moisture during winter and also pass inside the hive during summer. | 6) It works only as a moisture absorbent. It can only hold excessive moisture during winter. Before summer it should be removed. |
Between a quilt box a normal moisture board, I will suggest you use a quilt box because it has so many advantages over a moisture board.
In 2015 I used moisture boards to ensure ventilation in my beehives. When I first create and set up the moisture boards for my beehive. I thought that I do not need to take any other steps to control moisture in the winter. But after several weeks it proved me wrong.
I open the top of the hive to see the condition of the moisture board and notice that the board has become completely wet. So, I have to replace that board with a new one.
After then from 2016 I started using a Quilt box instead of a moisture board and it’s work pretty well for me. The quilt box can hold extra moisture for the entire season. So, you don’t have to replace the box for that season.
That’s why from my personal experience I will always recommend you use a quilt box instead of a moisture board.
Tips About Making Beehive Quilt Box
When you are deciding to take steps against extra moisture for your beehive. It means you are serious about the safety of your bee colony.
But before taking any steps for your beehive, you must learn if it is really needed for your hive.
The same thing goes for while deciding whether to place a quilt box on your beehive or not. Does every beehive need a moisture-controlling box?
The answer is definitely not. Most beehive doesn’t need any moisture board or quilt box. Many beekeepers also avoid it.
A quilt box is needed for your beehive if in your area the temperature is very low. If most of the time the atmosphere has a lot of moisture.
So, you must understand the atmosphere in your region. If it gets too cold then you can make a beehive quilt box for your beehive.
Now I am going to share with you how you can make a quilt box for your beehive. This doesn’t require any hassle and can be made easily at your home.
Necessary Materials To Make The Quilt Box For Your Bees
You don’t need a lot of materials to make your quilt box. I will share with you exactly how I made my quilt box. The following materials we will need to make the beehive quilt box.
- 4×3 Straight pieces of wood to make the feeding shim.
- Burlap
- Wood chips
- Hammer
- Small nails
- Sharp saw or any other suitable thing that can be used for cutting purposes
- Staple gun.
Shop the Materials

Natural Burlap Roll — 40″×15 ft
100% jute fabric — the absorbent base layer for your quilt box

YEAHOME 4-in-1 Heavy Duty Staple Gun
Includes 4000 staples — for securing burlap inside the spacer

KURUI 700 Pcs Nails Kit + 8oz Hammer
Hammer plus assorted nails — for building the wooden spacer frame
How To Make A Beehive Quilt Box For Bees [Step By Step]
When you have accumulated all the necessary stuff like wood, wood chips, burlap, scissor or sharp saw, hammer, and nails. You will need free space to disturb less working purposes. When you have all of these you are ready to go.
You will make the measurement according to your hive size. I am taking all the measurements here for a 10-frame hive.
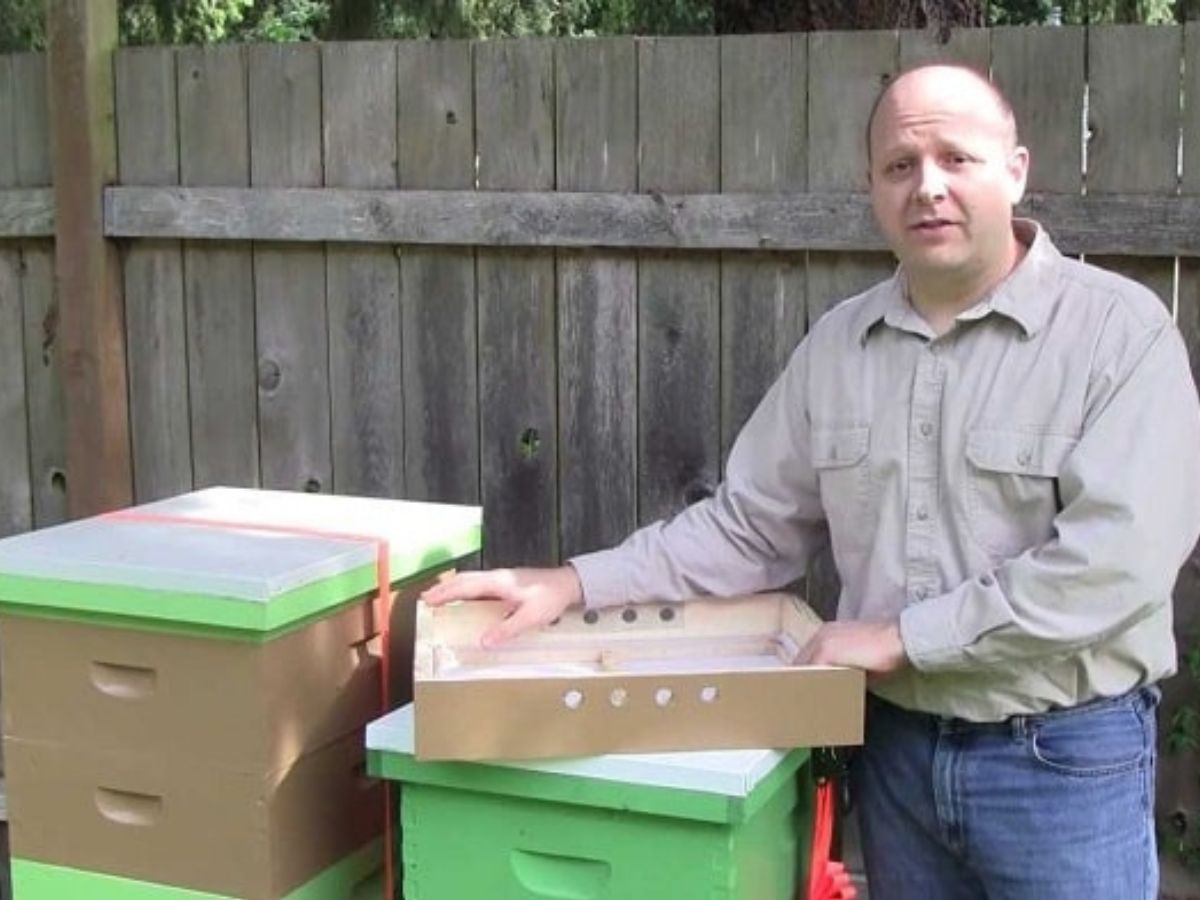
- Step-1: First let’s make our feeding shim which is basically a wooden spacer. We will need 4 pieces of straight wood. We will cut them such that we can use them to make a square shape spacer with 1×2 lumber. Cut them according to your beehive top size using a sharp saw. Then connect them using small pins and a hammer to make a proper square shape feeding shim. Make 3 same types of feeding shim.
- Step-2: As our spacer is ready now we are going to make our burlap ready to go within the spacer. Cut the burlap according to the size of the shim very carefully.
- Step-3: Now put the burlap over the spacer and staple it inside the spacer at every arm. It is super easy you can easily do this. Just staple it so that it has no chance of being torn apart from the feeding shim.
The purpose of putting the burlap inside the spacer is to make a base for the wood chips. It will help to hold extra moisture there.
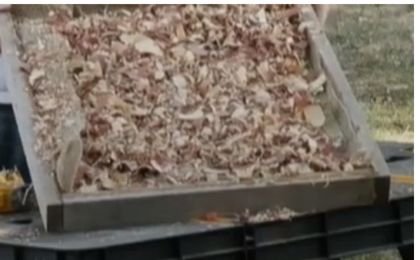
- Step-4: When stapling the burlap with a wooden spacer is done it will look like a basket. Now you have to spread wood chips over the burlap. Spread wood chips and fill the space among spacers.
The wood shavings that we spread over burlap would be enough to absorb the moisture that is going to come out through the beehive.
- Step-5: Now you have to create one or more ventilation holes on any of the sides of the spacer. You can also create this at the surface of the burlap. You can use a drill machine or any similar type of equipment to create the hole.
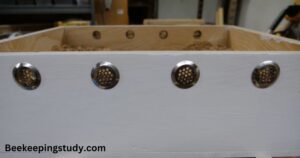
That’s it our quilt box is successfully constructed. Remember precision is not necessarily here.
You can take a large piece of burlap to cover the area among the spacer. After stapling you don’t even need to cut the extra burlaps too. Just pull them to place inside the spacer.
Quilt Box Alternatives — Compared

BeeTech 10 Frame Quilt Box — Hand Painted
Langstroth 10 frame, assembled, hand painted finish for winter

8 Frame Beeswax Coated Quilt Box
For 8 frame Langstroth hives, beeswax coated, ready to use
| Feature | BeeTech Quilt Box ⭐ | Beeswax Coated Quilt Box |
|---|---|---|
| Frame Compatibility | 10 Frame | 8 Frame |
| Finish | Hand painted | Beeswax coated |
| Langstroth Compatible | ✔ | ✔ |
| Pre-Assembled | ✔ | ✔ |
| Best For | Standard 10-frame hives | Smaller 8-frame hives |
| Rating | 4.7+ ★ | 4.7+ ★ |
| Buy | See Price → | See Price → |
Where Do You Put A Quilt Box On A Hive?
First of all, we don’t need the inner cover at the top of the beehive. If you wish you can keep it I would like to remove the inner cover.
Our one spacer will be put at the top of the frame. Above that spacer, we will put our quilt board. So, there is a gap between the hive and the quilt board.
This will help the bees to travel comfortably and swang around inside the beehive without interruption. You can also put feeds inside that spacer which is below the quilt board.
After the quilt board, I will suggest you put the third spacer. This will create a space between the telescoping cover and the quilt board.
Above the third spacer, you have to put the telescoping cover at the top of the hive.
That’s it. You have completed the setup of the beehive quilt board to control moisture for your bees.
Is Quilt Box Reusable?
The quilt box is completely reusable and recyclable. You can use it for many years easily.
The wood chips don’t last long and can be eaten by mice or wood-eating insects. So, you have to replace the wood chips to reuse the quilt box in the next season.
You can also reuse the spacer that we used to create our quilt box in the spring for smokers. Just remove wood chips and burlap then you are ready to use the spacer on your smoker.
How To Help Your Bees To Adopt With Quilt Board
When you make a change in your beehive your bees may need some time to adapt to that. All you can do is help them by giving them the time they need to adapt.
Beehive Starter Kit — 8-Frame Wax Coated Bee Boxes with Tools & Veil
Complete 8-frame setup with wax coated hive boxes, frames, beekeeping tools kit and veil — everything compatible right out of the box.
See Price on Amazon →
So, when you put a quilt box in the beehive you should live it for at least one week. Also, try the following things to make your bees comfortable with the quilt box. These tips worked for my case. These can be helpful for you too.
- After 1 week of placing the quilt box check the situation of wood chips from time to time. Just open the upper cover and check the wood chips. Usually, they remain dry. If somehow they become wet then replace them with new wood chips.
- Must try to put a spacer below the quilt board. This will allow you some space to put sugar boxes and other bee foods. Also, your bees will have more space to swing around.
- While you are trying to add food to your beehive. I recommend you try not to open the entire upper cover with the quilt box directly. Slightly push the spacer and make a small space and put your food box then close the spacer again as usual.
- Make sure your bees aren’t got hurt by the burlap of the quilt box.
- Cover the ventilation hole with a net to prevent mice and other harmful creatures from entering the hive.
- Try to avoid using household chemicals in your beehive that can be harmful to your bees. If you are using bleach or a similar type of chemical in your beehive you must learn this before.
If you can follow these steps for a couple of days. Your bees might very easily and very soon adjust to the quilt box.
Conclusion
So, you learned how to make a beehive quilt box in your home to control extra moisture. I think you can easily make it on your own. But still, if you want to purchase a ready-made quilt board you can also do this.
During winter the atmosphere might have uncontrolled moisture. You must be more careful about your colony during this season.
Among all of the moisture-controlling ways available, a quilt box is the best option. I personally recommend you purchase or make it on your own for your bees.
Ensuring the proper safety of your bees means taking your beekeeping success one step away.
A beehive quilt board can be helpful for both winter and summer, because it will work as a regulator. So, it will block or allow moisture to go inside when your beehive needs it.
Now you can check my article on how to requeen a queenless hive.