This post might be created with help from AI tools and carefully reviewed by a human (Anthor Kumar Das). For more on how we use AI on this site, check out our Editorial Policy.
Ultimate Guide To Make A Honey Warming Cabinet (2 Methods)
For beekeepers, it’s important to maintain the quality of the honey always pure and perfect. That’s why a honey warming cabinet will be a good friend for you to keep your honey pure and fresh. So, how can you make a honey warming cabinet on your own?
Don’t worry this guide will help you with 2 different methods to build a honey-warming cabinet. The first method is using an old fridge which is comparatively easier but costly. And the second method is without using a fridge and seems to be cost-efficient.
Both of these techniques are very easy anyone can do this on his own. So, you can follow any of the methods and build your honey warming cabinet on your own.
What Is A Honey Warming Cabinet?
A honey warming cabinet is specially used to liquefy crystallized honey and keep honey at a proper temperature. It is a commonly used element for beekeepers who lived in the cold region. When it’s too cold honey starts to crystalize so it needs to warm to melt and return to its liquid form.

The honey warming cabinet provides sufficient heat to melt the honey from its crystalized form without causing any damage to its enzymes and nutrients.
How Do You Keep Honey Warm?
Honey can be kept warm by storing it in a bottle and placing it in a hot water tab or placing the honey container in a warming cabinet.
Honey will lose its quality if you didn’t keep it in a warm place at a suitable temperature.
What Temperature Is Safe To Melt Honey?
Crystalized honey should be kept at a temperature between 100°F to no more than 110°F. The ideal temperature that will effectively and quickly melt honey is 110°F.
But make sure the temperature is no more than that. Otherwise, the honey might get degraded and lose some of its nutrients and enzymes.
Why Use A Honey Warming Cabinet?
The main purpose of using a honey warming cabinet is to keep the honey warm and prevent crystallization. If you are living in a cold region then there is a high chance you will get crystallized honey from your beehive.
At the early stage, when you have a limited budget for beekeeping, you don’t need a honey warming cabinet. However, if you see crystallization starting, you might go for one.
Honey requires more warmth than the minimum temperature required for bees to live in a hive. Otherwise, honey gets crystalized and lost its significant nutrients. That’s why a honey warming cabinet is mostly necessary.
The followings are the major reason why a beekeeper needs to use a honey warming cabinet.
- Preventing Crystallization: Honey will start getting crystalized if it is kept below 24°C. The best temperature to keep honey liquid and fresh is around 100°F. That’s why A warming cabinet is necessary to prevent honey from getting crystallized.
- Filtration Purpose: Keeping honey in a warming cabinet will make the filtration easier. Removing wax and debris from honey will be quite easier while it is within the temperature of around 100°F.
- Maintaining Quality: You might know honey never get expired but it can degrade over time. Also, it will lose its quality very fast if not stored at the proper temperature. To ensure the proper quality and prevent degradation of nutrients a honey warming cabinet will be very helpful stuff for a beekeeper.
- Prevent Molds On It: Sometimes you need to harvest honey from molds on the frames. In such a situation, you have to place the frame in a honey-warming cabinet to dry it. Then you can remove the molds using needles and harvest the honey.
So, you can understand how important a honey warming cabinet is for a beekeeper. Now let’s dig into the DIY guide to building a honey warming cabinet.
How To Make A Honey Warming Cabinet?
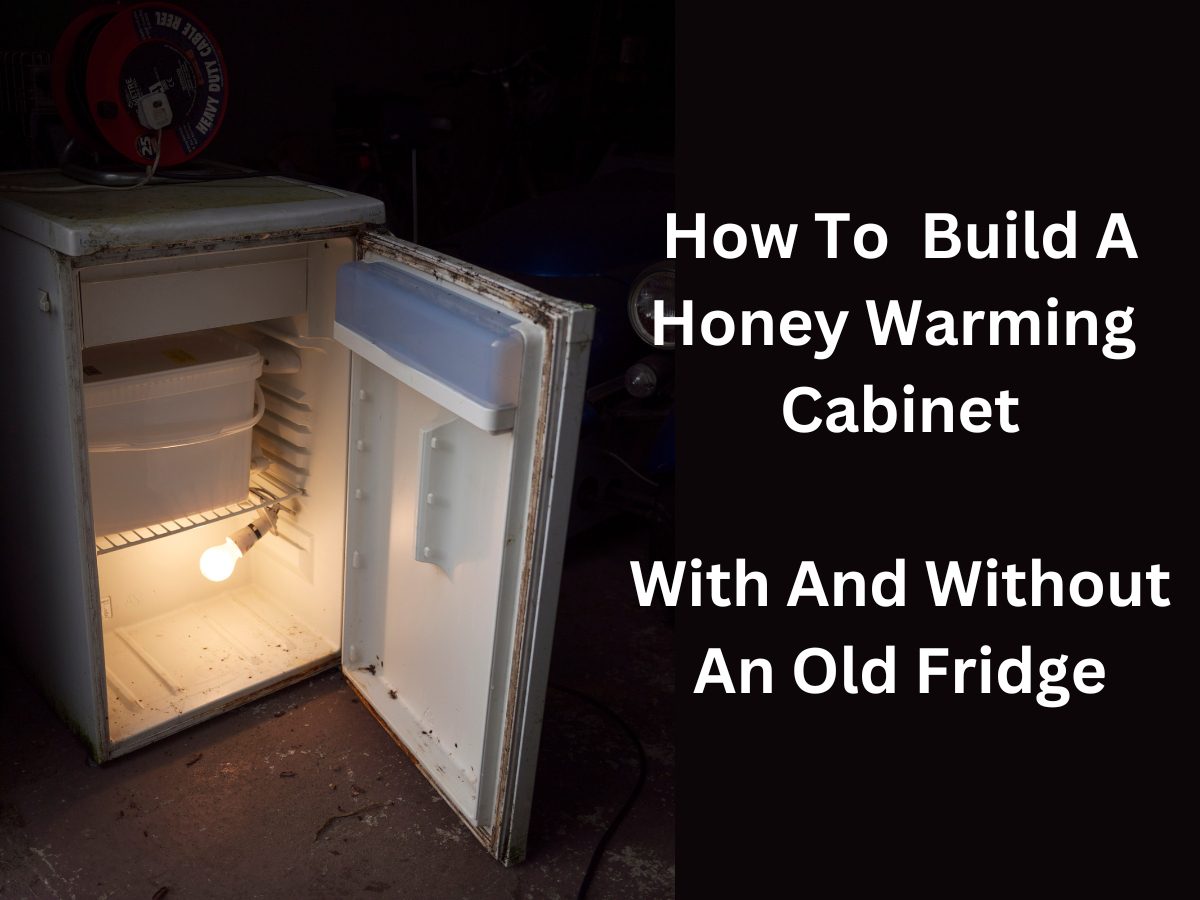
Well, there are 2 different ways that I have personally used to make a honey warming cabinet. Once when I didn’t have an old fridge I made the warming cabinet simply using a wooden box and aluminum foil paper, with 2 electric heater.
Then when I have an old fridge that can be used for building the warming cabinet. Then I made another honey warming cabinet very simply using a hit bulb and Inkbird temperature controller.
I am currently using my warming cabinet during winter to keep my honey safe and to prevent crystallization. So, now let’s learn both techniques that I have used to build a warming cabinet for honey. First, let’s learn how we can easily make a warming cabinet using any old fridge.
How To Make A Honey Warming Cabinet Out Of An Old Fridge (Method-1)
To build the warming cabinet using an old refrigerator you require the following components.
- An old refrigerator.
- Temperature controller.
- Heat lamp (Red).
Try to purchase a Red heat lamp having a clamping device. I recommend a 100-150 watt red heat lamp because it cost less and also it will be more effective to increase the heat faster. I used an Inkbird temperature controller you can also use it. You can even purchase it from Amazon or from your near super shop. It will help to control the temperature inside the fridge within a certain range.
After accumulating all the components together select a suitable place for all the setup. Then follow the steps below.
- Step-1: You don’t require any electrical connection directly to the fridge. Keep only the bottom and the top shelves and remove the other shelves from the fridge.
- Step-2: Put 2 or 3 honey buckets on the bottom shelve of the fridge. The number of honey buckets and bottling buckets you can keep depends on the space you have between the shelves and your bucket size.
- Step-3: This is an important step. You have to set up the heat lamp connection which is the main thing that will warm the atmosphere inside the fridge. Put the heat lamp on the top shelve by clamping it on one side of the fridge. Now the power connector should connect to the Inbird temperature controller’s heating plug.
- Step-4: Transfer the temperature controller end part outside the fridge through the back side of the fridge. You can remove the fridge’s previous power connector as it doesn’t have any necessity. Or drill any area and transfer the wire from outside the fridge to inside the fridge as necessary. Make sure you filled the extra area of the hole after setting up the wire inside the fridge.
- Step-4: Now hang the temperature controller on any stand-by material. Make sure the temperature controller is at least one meter above the ground.
- Step-5: Now connect the power connector to your house’s electrical line. Then set up the temperature of the controller according to your desire. In my case, I have set up the temperature controller such that when the temperature is above 108° F it will turn OFF the bulb. Then when the temperature falls below 105° F the bulb turns ON.
That’s it you have successfully built and completed setting up your DIY honey warming cabinet using an old refrigerator.
Now If you can’t manage an old refrigerator then you should follow the alternative method. Now let’s learn our second method of building a warming cabinet to liquefy crystalline honey.
How To Build A Honey Warming Cabinet Without Any Fridge (Method-2)
To build the honey warming cabinet without any fridge you require the following elements first.
- 2 square shape plywood boards.
- Some straight wooden parts.
- A wooden board or plastic board.
- Square shape 1 big box having 2 sides opened and another half feet height box.
- A honey super or use another half feet height box.
- 2 electric heaters of 35 to 45 watts or 2 red heat bulbs.
- Temperature controller (Optional).
The 2 plywood boards will be at the bottom and top part of the warming cabinet. You can make large wooden boxes according to the height of the honey and bottling buckets.
You can choose the dimensions of every necessary thing according to the space dimension you need for the honey buckets. The box also can be an abandoned beehive box if it is in good condition.
After accumulating all the necessary stuff altogether follow the steps below to build the honey warming cabinet.
- Prepare the 2 plywood boards: First, cover the inner side of the board with Aluminium foil. Aluminum foil is extremely heat resistant so it will keep the heat inside the cabinet. Then drill a small hole in the cabinet. Then place the heater in the middle of the board. I would recommend you to use a 40-watt electric heater. Then pass the heater connector wire outside the board through the hole. Both plywood boards set up are the same.
- Prepare wooden board: Now make some circle-shaped holes on the wooden board. These holes will help to pass the heat from the heater to the box where the honey bucket will be stored.
- Set Up The Basement: First place the plywood board on the bottom and your heater should be in the upward direction. Then put the half-inch height wood box above the plywood board. Now put the wooden board that you prepared at step-2 above this box. That’s it your basement is ready.
- Put the big box above the basement then put your honey buckets or bottling buckets into that box.
- Now put the honey super or half feet height box above the large box to give some space between the honey buckets and the electric heater.
- Then place the remaining plywood board on the top that you prepared in step-1. Make sure the electric heater connected part of the board is downwards now.
Your honey warming cabinet without a refrigerator is ready to use now. I have used 2 40-watt electric heaters. But you can use 2 red bulbs instead.

If you use red heat bulbs make sure you used a Temperature controller like the Inkbird temperature controller. As you are using 2 bulbs here instead of 1 bulb as you used on the honey warming cabinet building process using a fridge.
Here you have to place the temperature sensor in the box where the honey buckets are stored. And the power connectors of lamps need to be parallelly connected to the heating plug of the temperature controller.
What Temperature Should I Heat My Honey Inside The Cabinet?
You should keep the temperature around 100° F inside the cabinet. But never heat above 110° F. For My case, I set the temperature fluctuation inside the cabinet from 105° F to 108º F.
You can set the temperature fluctuation as you want but not more or less than that.
How To Use The Inkbird Temperature Controller?
The Inkbird temperature controller has a digital display. Here you will be able to see the current temperature inside the place where the sensor is placed.
It has 3 buttons Set, Down, and Above button. You can use these buttons to set up the temperature control to your desired range.
If the temperature goes above the range it will plug off the heating device connected to it. And if the temperature goes below the lower limit it will plug on the heating device.
There are 2 LED indicators on 2 sides right above the buttons. The heating LED indicator ON means the heating plug is turned ON. The cooling indicator ON means the cooling plug is turned ON.

At the bottom section of the device, 3 wires are connected. The thin wire is the temperature probe that goes inside the warming cabinet. It tells the current temperature inside the cabinet. The middle cable has 2 outlets heating and cooling which is used to provide power to the device you are going to control. The other remaining wire is the power connector of the device.
Final Thoughts About Making A Honey Warming Cabinet
A honey warming cabinet is such an important device for every beekeeper to keep honey pure for a longer period of time. Hopefully, this guide helped you to learn 2 different methods on how you can make a honey warming cabinet at your home easily.
If your honey is just started to crystallize or already become crystallized then put the honey bucket inside the honey warming cabinet. Keeping the honey bucket inside the warming cabinet for at least 2 weeks or more will successfully liquefy it.
Also, if you put your honey bucket inside the warming cabinet for a few days. Honey will be more transparent, wax and debris will be more easily removable, and the bottling process will be more easier.
So, which method have you used to build your honey warming cabinet? Let me know through the comment section. Now check how to clean beeswax wraps to safely store food.