This post might be created with help from AI tools and carefully reviewed by a human (Anthor Kumar Das). For more on how we use AI on this site, check out our Editorial Policy. This post contains affiliate links. We may earn a small commission at no extra cost to you. Learn more.
4 Easy DIY Bee Vacuum Plans
People often called me to rescue a swarm from unwanted locations. I had to collect swarms from a house wall which is in a very high place, from a tall bunch of trees, from the tinny space between two closed walls, etc.
The most effective device that I used to catch swarms from these weird locations is a bee vacuum. I build my own bee vacuum with a cost of less than 50$. So, instead of purchasing a bee vacuum, you can easily build one yourself.
In this post, I am going to share 4 easy DIY Bee Vacuum plans with you. All of these bee vacuum plans are very simple. A couple of these are tried on my own and others I got from other expert beekeepers.
You can easily implement any one of them. So, you can build your own bee vacuum which is most suitable for you.

Koblenz Wet Dry Vacuum — 2 Gallon 2.0 PHP with 10 ft Hose
Compact, portable shop vac with Twist-N-Lock hose and accessories — the ideal base to build your own bee vacuum from.
See Price on Amazon →
What Is A Bee Vacuum?

A bee vacuum is a device used to suck up bees from weird locations. It has 3 major parts suction motor, a hose, and a collection chamber. Bees soaked through the suction pipe and collected in the collection chamber.
Beekeepers use bee vacuums to rescue a swarm from difficult locations. Expert beekeepers make money by providing bee rescue and relocation services.
The device is so secure that it doesn’t cause any harm to the bees and beekeepers. Before using a bee vacuum you must learn how does a bee vacuum works.
Can You Use A Shop Vac To Suck Up Bees?

No way! You can’t directly use a shop vacuum to catch bees. The shop vacuum produces high suction pressure that kills bees.
But you can convert a shop vac into a bee vacuum using additional components. That’s what I am going to discuss.
How To Turn A Shop Vac Into A Bee Vacuum?
To turn a shop vac into a bee vacuum we should lower the suction pressure of the vac. Also, we must provide a suitable collection chamber, where the bees will be stored until they transfer to a beehive.
So, you have to use a screen with a damper to control the suction pressure. Also, you have to use a suitable temporary box or a super to collect the bees after suck up.
4 Easy DIY Bee Vacuum Plans
The purpose of this post is to share DIY Plans for building a bee vacuum that is simple and effective. To build a bee vacuum you will require some hand tools and materials. These materials are common for all of the bee vacuum plans.
The following are the common materials needed for building a bee vacuum.
- Hole saw.
- Screw.
- Screwdriver.
- Hose pipe.
- Battery-powered impact driver.
- Screen with a damper.
- Tape.
These tools will make your work easier. So, try to keep them around you while you are building the bee vac. Now let’s move to our 4 simple bee vacuum plans.
Shop the Materials


Plan-1: Build A Portable No Kill Bee Vacuum Using Shop Vac
This DIY bee vacuum plan is my own tested method. For this portable bee vacuum building process I used the following components.
- A small shop vac.
- A Medium size hose.
- A suction pipe (tube).
- Pipe cap to prevent air.
- Screen with a damper to control suction pressure.
- A sealed large plastic container.
- A foam to prevent dead bees.
Following are the steps for building this no-kill bee vacuum.
- Step-1: Using the hole saw create 3 to 4 holes in one side of the box.
- Step-2: Cut the suction tube to one side longitudinally having a depth of 1 cm. You can also make some small holes instead of cutting the tube. The purpose is to provide airflow inside the tube.
- Step-3: Attach the suction tube at one side inside the box and attach it in a hole. Then put the cap to close the outside hole of the tube. Make sure there isn’t a large space.
- Step-4: Now set up the suction pipe of the shop vac on another hole. This will draw the bees to the box through the suction pipe of the shop vac.
- Step-5: Now place the screen on the other 1 or 2 holes which are in the middle. Then place the damp in the middle of the screen. The screen should be capable of passing airflow to the box. The damp will allow you to lower the suction pressure of the shop vac as required. You can use some screws to attach the screen tight to the box.
- Step-6: Place the foam at the bottom of the box. It will prevent bees from getting hurt while hitting the bottom of the box.

Now check if everything is okay. If required use a tape to fill any large space where the bees can go out. That’s it your portable bee vac is ready to use and it won’t kill any bees during the suck-up process.
Plan-2: Build A Battery Powered Bee Vacuum
I also built a battery-powered bee vacuum using a battery-operated vacuum I used in my car. The following are the materials I used for building this particular bee vacuum.
- 3-gallon Battery-operated vacuum.
- A 7-gallon bucket.
- A medium or large hose.
- A PVC coupling.
- Screen.
- Wooden snug.
- A foam you can use any equivalent clothes like a towel too.
Following are the steps you can follow to build this DIY bee vac.

- Step-1: First create a hole at the lower section of the bucket. It should be according to your hose mouth size.
- Step-2: Set up the PVC coupler to the hole so that it can attach to the hose perfectly. Then connect the hose to the PVC coupler.
- Step-3: Make 2 holes at the top cover of the bucket. In one hole place a PVC coupler and attach the hose of the battery-operated vacuum. On the other hole place the screen with a damper for controlling suction pressure.
- Step-4: Create a wooden snug and cover it with a window screen. You can use any net screen. Make sure it fits well below the top cover of the bucket. Place it inside the bucket so that there is a 2 inches gap between the snug and top of the bucket.
- Step-5: Place the foam at the bottom of the bucket to prevent dead bees.
Assemble everything together and that’s it your battery-operated bee vac is ready to use.
Plan-3: Using A Bucket head wet/dry vac
This is the simplest among all of the 4 DIY bee vacuum plans. To build this you require the bucket head wet/dry vac and a 5-gallon bucket. You can purchase the bucket head wet/dry vac from any online store or from a nearby shop.
This device is used for cleaning both dry and wet substances. It is designed so that it can fit any type of 5-gallon bucket.
As it produces high suction pressure it can’t be used directly. Modify it according to the simple steps to use it for catching bees.

- Step-1: First make a hole in the bucket for ensuring airflow. Place a screen so that bees can’t go out.
- Step-2: Place a household foam material at the bottom of the bucket.
- Step-3: Place the bucket head wet/dry vac above the bucket.
That’s all your bee vac is ready to use as simple as you like.
I would like to mention one thing. The only challenging task for this process is creating the hole in the bucket. You can create a large hole first. Then put a screen from the inner side of the bucket.
If you found the suction pressure is too low put a tape to reduce the hole diameter. Also, you can place a damper for this purpose.
Perfect Combo for Plan 3

CRAFTSMAN Wet Dry Vac Powerhead — 1.75 Peak HP
Fits any 5-gallon bucket, includes hose & filter — portable & lightweight

MKS Plastics 5-Gallon Bucket — Food Grade BPA Free
Made in USA, heavy duty, metal handle — required for the vac above
Plan-4: Make A Bee Vac Using Super And Foundation
Well, this is the modified version of my first and second plans for building a bee vac. For this process, you have to use a super with some plastic foundations in it instead of a bucket or plastic box.
You can use a regular shop vac or battery-operated car vac whatever you want for this process.
If you want to use a large box like in the first plan, you can go for it. All you have to do is put a honey super at the bottom of the box with some plastic foundations in it.
If you want to build a bee vacuum without any plastic box or bucket you can follow the steps below.
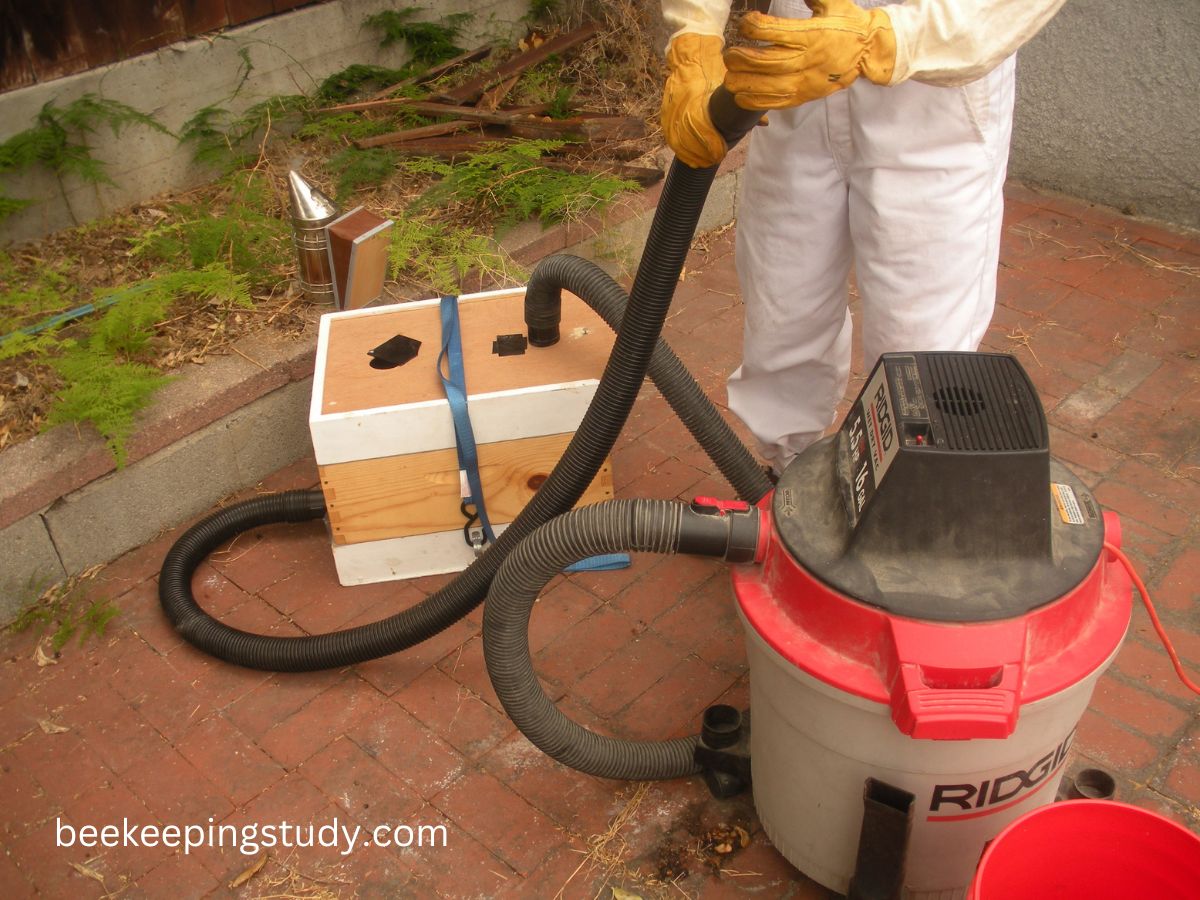
Step-1: Create The Box
First of all, you have to create the box which is the main thing. The material used to build the box can be similar to that used in a beehive.
- Use a honey super at the bottom of the box.
- Put plywood at the bottom of the honey super to close its bottom empty space.
- Put a screen above the super and attach it using a stapler or screw.
- Then place an empty wooden beehive box above the super.
- Above that empty box put a deep brood box containing a few empty foundations.
- Above the brood box place another empty box.
That’s it your structure is ready for the bee vacuum.
Step-2: Setup The Motor
Now you have to take the motor part from the shop vac or whatever you are using. Then create a hole above the top empty box according to the space required to place the motor. Then attach the motor to this hole.
Step-3: Create a Ventilation Hole
Place another hole above the top empty box. Place a screen on the hole for ventilation purposes to control the suction pressure.
Step-4: Attach the hose at the bottom box
Now create a hole at the empty box above the super. Then attach a hose to this hole. You can use any size of hose as you want.

That’s it your bee vacuum using Super and the foundation is ready to use. The hole arrangement is shown in the picture.
You can keep your bees in this box safely for a longer time than the other 3 methods.
Final Words On DIY Plans For Bee Vacuum
So, now you have a list of bee vacuum plans. Choose your own DIY method and build a portable bee vacuum.
After making your own bee vacuum, don’t directly use it on bees. Without proper knowledge of how to use a bee vacuum, it can be deadly for bees
First, test it on some wood shavings or any other lightweight elements. When you find your suction pressure is low enough to catch bees safely, you can apply it to a swarm.
Also, after catching any swarm don’t keep them on the box for a long time. Try to transfer the swarm to a full-sized beehive as soon as possible.
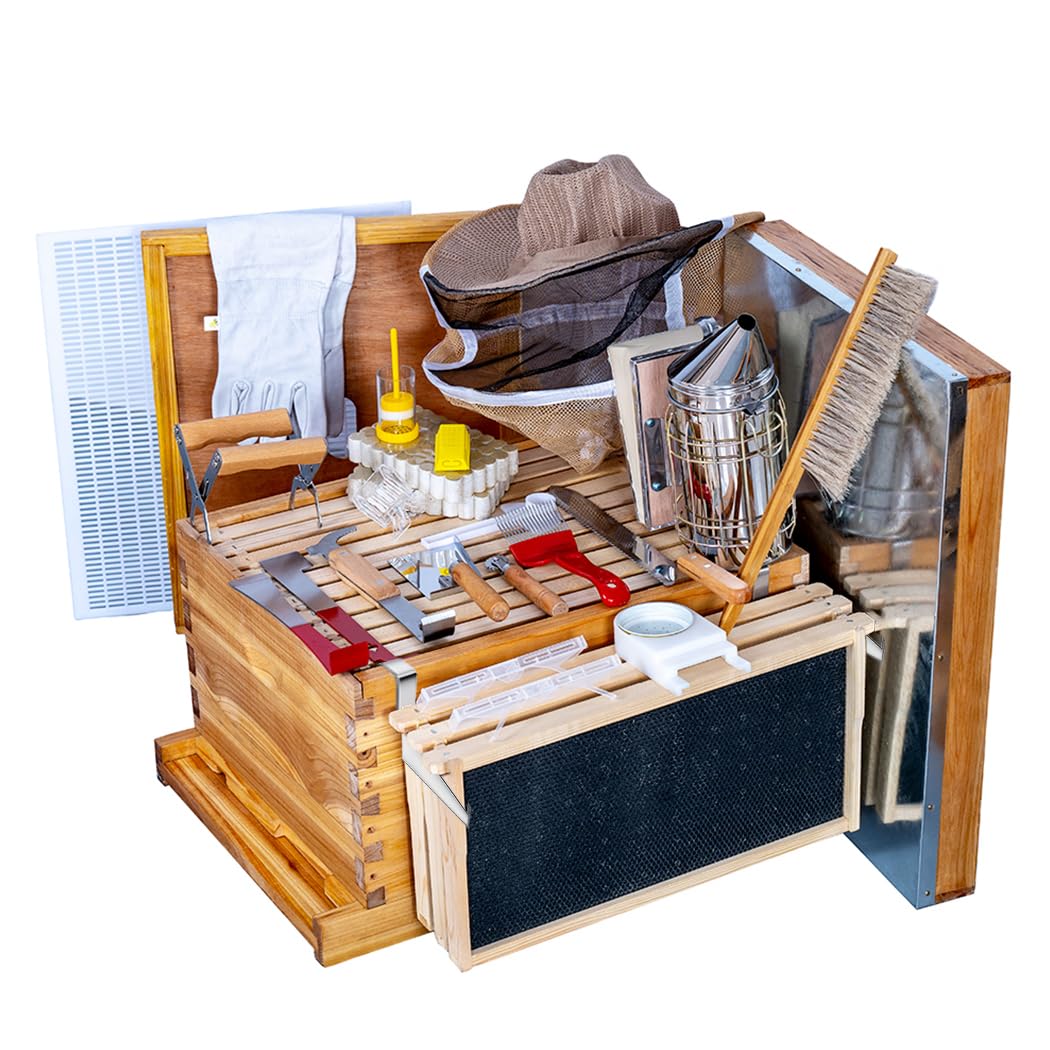
Beehive Starter Kit — 8-Frame Wax Coated Bee Boxes with Tools & Veil
Complete 8-frame setup with wax coated hive boxes, frames, beekeeping tools kit and veil — everything compatible right out of the box.
See Price on Amazon →So, which bee vacuum plan will you use to build your own bee vacuum? Let me know in the comment section. Happy beekeeping.