This post might be created with help from AI tools and carefully reviewed by a human (Anthor Kumar Das). For more on how we use AI on this site, check out our Editorial Policy. This post may contain affiliate links. We may earn a small commission at no extra cost to you. Read our affiliate disclosure.
DIY Guide on How to Install a Package of Bees in a Hive

During the fall of 2025, I got the chance to install a bee package for the first time. I wasn’t ready for this, so I wondered how to install a package of bees in a hive properly. I’ll share that story and everything else in this article.
For my own apiary, I use bee nucs. A nucleus hive is the ideal head start for sustainable beekeeping. Package bees are ideal for a quick start; thus, most beginners prefer this method.
But there are a lot of advantages of nucleus hives over package bees for starting a new honey bee colony. This is why I always use a nucleus hive to start my new colonies.
But last year I had to go to Govindopur village in my region. There I had to help a person who is starting his beekeeping journey as a full-time work.
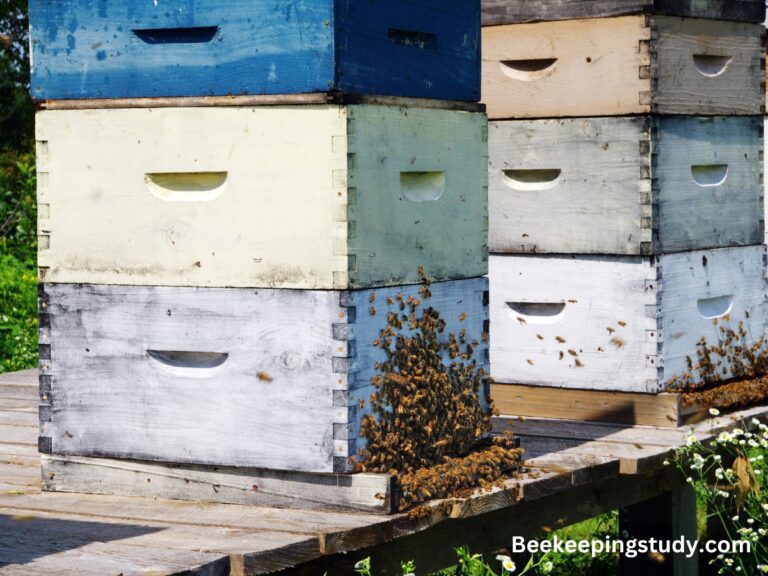
In fact, before going, I was not sure that he was getting package bees instead of a nucleus hive. When I reached there and went to his apiary, where he was placing his beehives, I saw 4 boxes of bees.
He told me that he wanted me to transfer those bees to the full-sized beehives and guide him to start his apiary. But that was my first time transferring a package of bees to a beehive.
So, I did some quick research online and watched several YouTube videos. Combined the common things and used my years of beekeeping experience to successfully transfer the bees from the package to the hive.
That’s what I am going to share with you in this article.
#1 Rule of Installing a package of bees to a beehive: Make sure the queen is caged and transferred to the beehive and gently push the workers inside the beehive. Some of the workers might fly away don’t worry about them. Getting the queen safe and securely is the crucial step.
What is a Package of Bees?
A package of bees is a quick and portable way to start a new honey bee colony. Usually, it contains a caged queen and worker bees from different honey bee colonies.
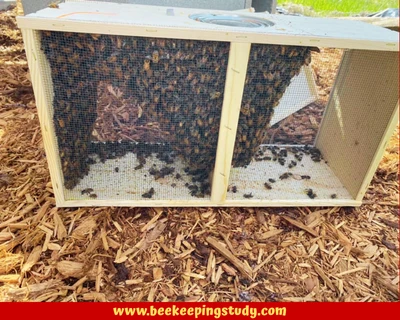
The queen usually comes from a strong, established colony. The worker bees come from multiple different colonies. As a result, most bees in a package are strangers to each other.
This is the reason why most beekeepers call the package bees an “artificial swarm“.
What’s Really Inside a Package of Bees?
Usually, a package of bees contains the following things in a wooden and mesh box.
- 2-5 pounds of worker bees.
- A caged, marked queen with several attendants.
- A metal can filled with about 50% sugar syrup.
The Package Sizes & Number
Each package of bees usually comes with 2, 3, or 5 pounds of bees. 2 & 3 pounds are most common.
Each pound is around 3,500 worker bees. So, a 2-pound package contains roughly 7,000 and 3 pound package contains around 10,000 worker bees.
The 3-pound box usually measures 6 × 10 × 16 inches, with wire mesh on the sides for airflow.
The Caged Queen Bee
The queen is very crucial for the package. She comes in a Benton cage, a small wooden box with mesh stapled over it.
Inside the queen cage, there are 2-3 attendant bees and, at one end, a candy plug. Both ends contain cork. The candy plug and the corks are the slow-release door for the queen.
How to Install a Package of Bees in a Hive (Step-By-Step)
Now comes the most important part: installing a package of bees into a beehive. For this part, different beekeepers follow different methods. Here is the method I followed, and I will also tell you other alternatives beekeepers usually use.
What You’ll Need?
Package bees are usually not defensive. So, you might not need a full bee suit for their installation.
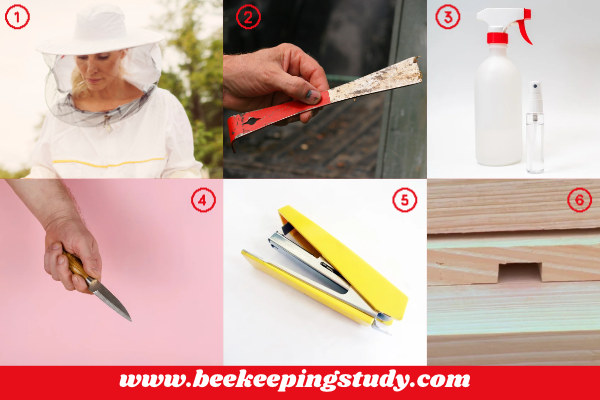
However, I still recommend using a veil. Here is the complete list of tools you might require to complete the installation safely and securely.
- A Veil
- A Hive Tool
- A Spray Bottle with 1:1 Sugar Syrup
- A Small Knife
- A Staple Gun
- An Entrance Reducer
Preparing the Hive
The hive must be prepared before pushing the bees into it. Perform the package bees installation in a warm day temperature between 55°F to 65°F during daylight between 11 AM to 3 PM.
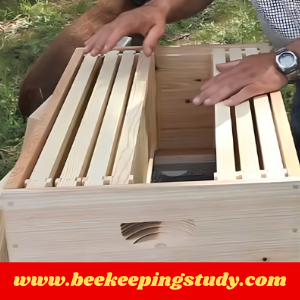
Use a 10-frame brood box for this task and then follow these 3 steps to prepare the hive.
- Remove the Telescopic cover and put it aside.
- Remove the inner cover and put it aside as well.
- Now, from the brood box, remove 3 to 4 frames from the middle. Make sure both sides have at least 3 frames.
Preparing the Package to be Transferred
When the hive is ready to accept the bees, it’s time for the package to be ready to be placed inside.
- Take the package above the hive and, using the hive tool, open the wooden cover above the can.
- Using the hive tool, gently start pulling the metal can. Don’t entirely remove it.
- As the bees cover the sugar can, you have to shake it downwards before pulling the metal can out of the box. This releases most of the bees from the body of the can.
- Slowly remove the can and immediately cover the gap with the wooden cover so that no bees can come out.
- Now cut the strap close to the staple through which the queen cage is trapped inside the package.
- Slowly take out the queen cage with the strap out of the package box.
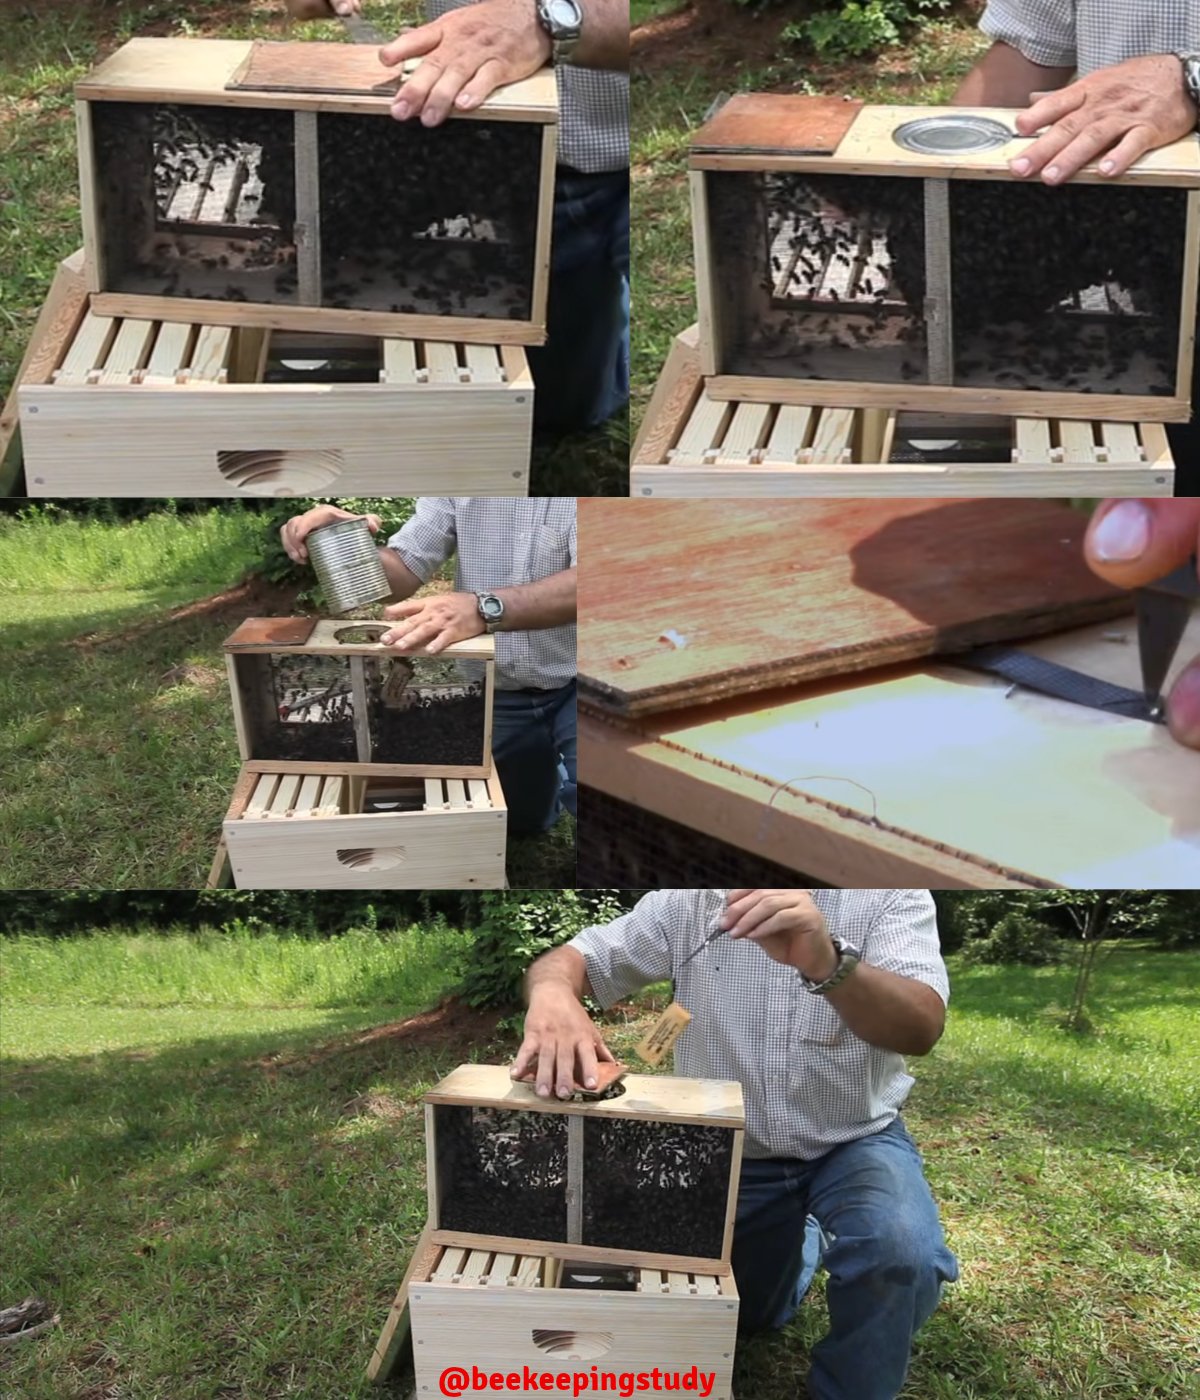
First Step of The Transfer: Install the Queen
After taking the queen out of the package box, you have to place her inside the beehive. Before placing her in the hive, you have to make the cage ready to be installed.
- First, pull the strap if it is on the opposite side of the candy and staple it back to the candy side.
- Now, using a small knife or similar tool, slowly remove the cork from the side that contains the candy.
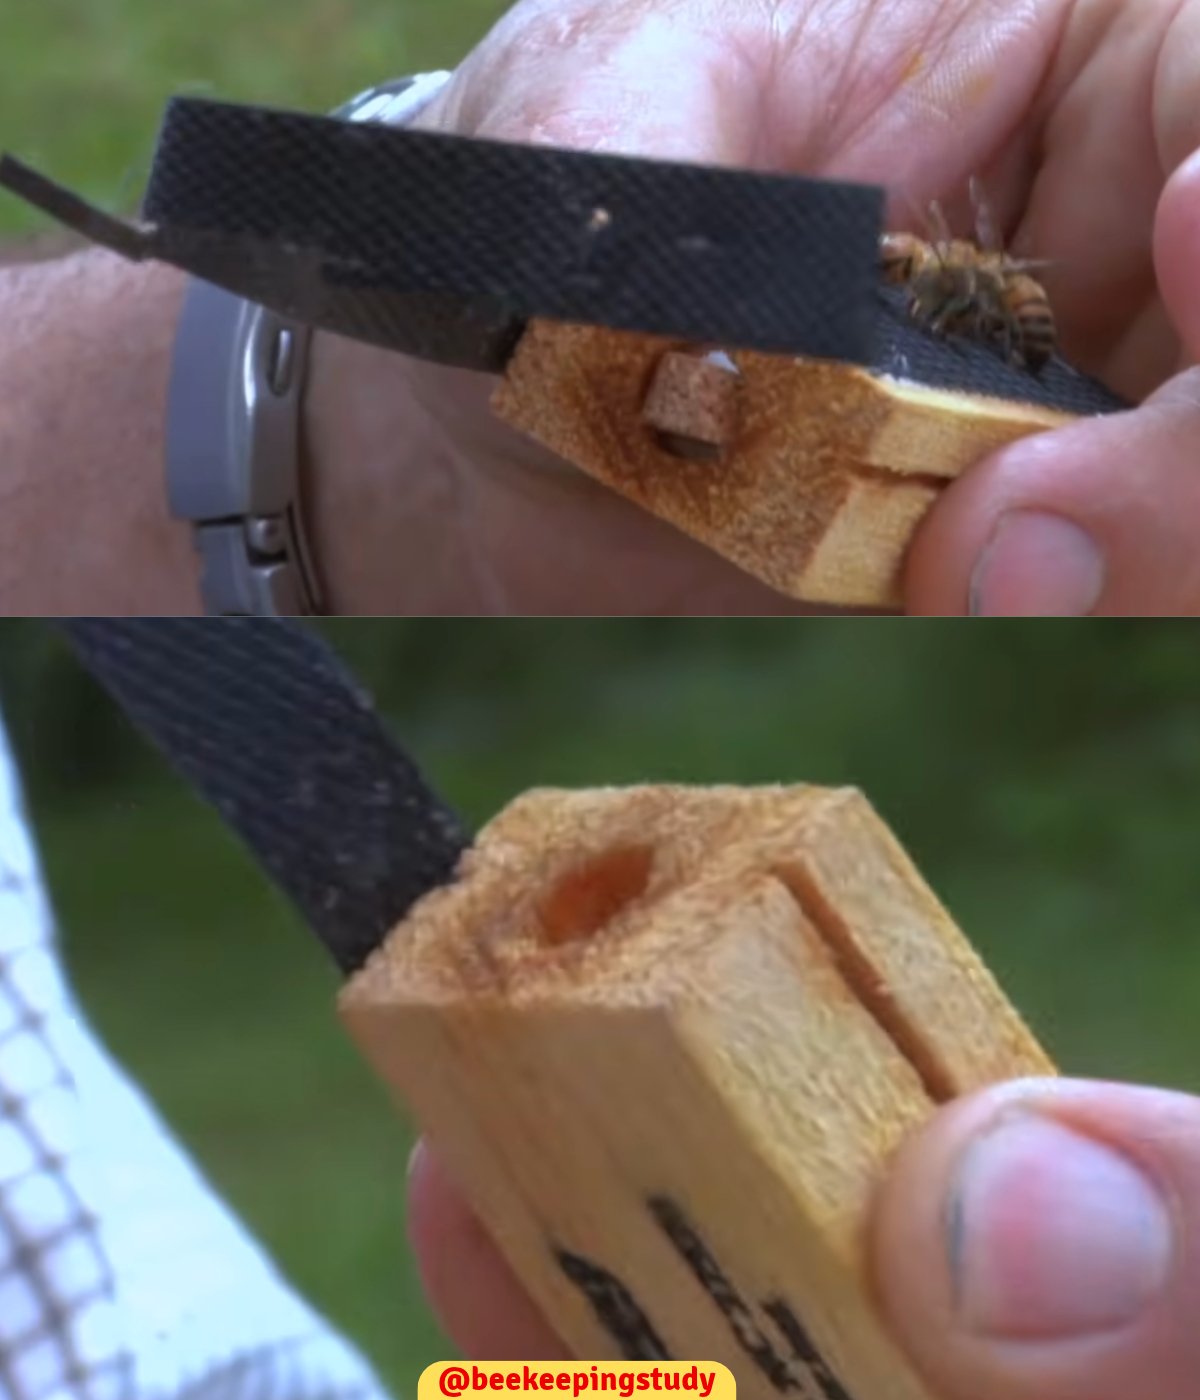
Now it’s time to set up the queen cage inside the beehive. People often use 2 methods for this.
- Method 1: Place her hanging at one side of any of the frames in the middle. The hanging strap is stapled at the top of the frame so the cage is hanging with the frame. Make sure the candy side from where you removed the cork is upwards.
- Method 2: Put the shim above the frames and place the caged queen upside down on top of the frames. Place the queen cage in a way so that the screen of the cage is between 2 frames close to the middle. I used this method.
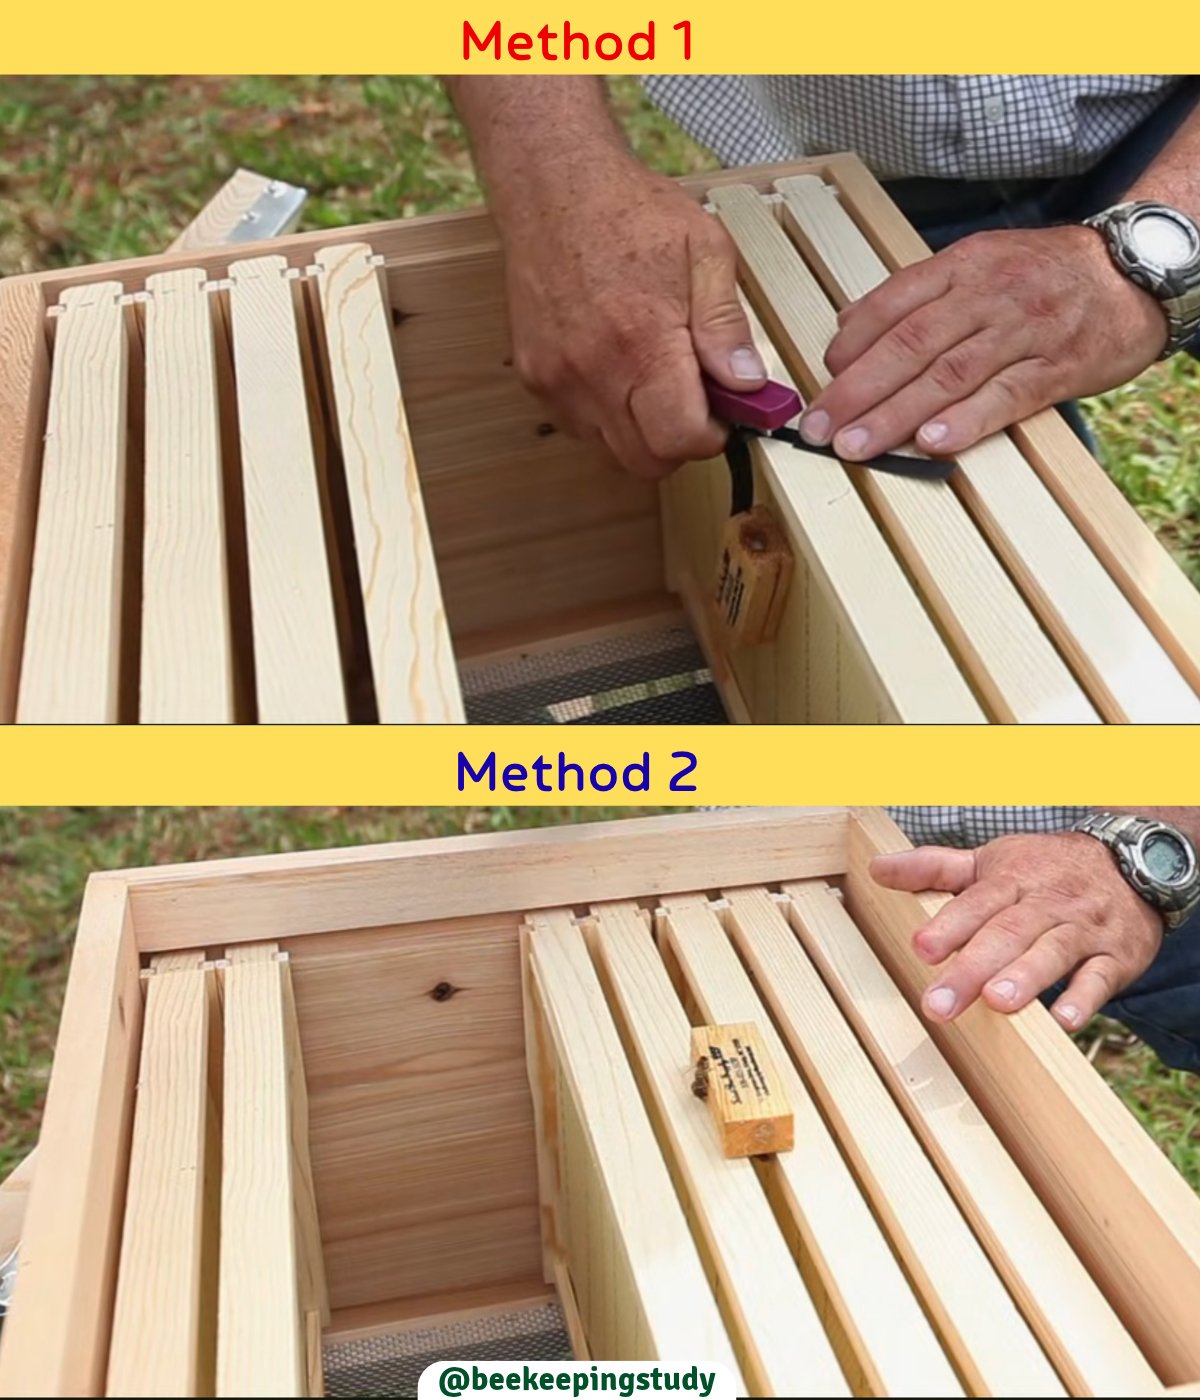
Note: For method 2, you have to keep the screen downwards at top of 2 frames so that the screen is between the empty space of the 2 frames. This is to make sure worker bees can come up and feed the queen and finally release her by eating the candy plug.
Transfer the Worker Bees (2 Methods)
After placing the queen properly, the only step left is pushing the worker bees inside the beehive. Some people prefer aggressive methods and some gentle methods.
The Aggressive Method
This is the easiest and fastest method of transferring the workers inside the hive. This method takes the following steps.
- Spray 1:1 sugar syrup on both sides of the box.
- Take the box above the beehive and place it upside down.
- 1,2, and 3, and start shaking and tapping the box so that bees fall inside the hive.
- Continue the pushing and tapping so that all the bees are out of the box and inside the hive.
However, during this process, you can damage some of the bees, which is actually normal. But I didn’t follow this method. As that was my first time transferring a package of bees to a beehive, I followed the gentle method.
The Gentle Method
This method also uses the push and tap method but not as aggressively as the previous one. Here is how you should do it.
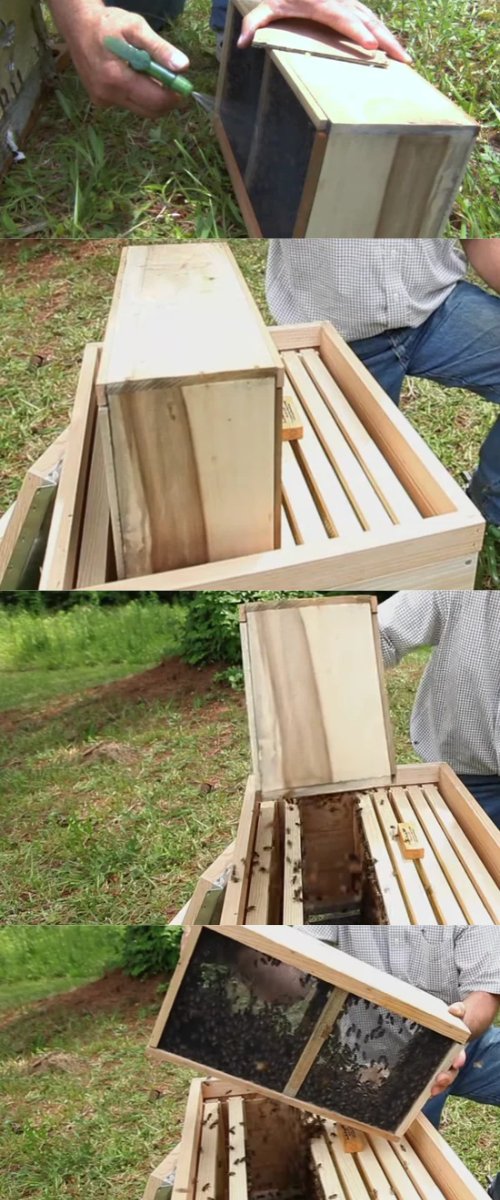
- First, spray the sugar syrup on both sides of the mesh of the packaged box.
- Take the box above the beehive and keep the top-opened part upside down above the hive. Make sure the open area of the package box is downward, over the empty middle part of the beehive (From where frames were removed).
- You can place an empty beehive box above it or leave it as it is for 2-3 hours. Doing so, most of the bees will go inside the hive on their own.
- After a couple of hours, you can now slowly shake the box so that hanging bees fall inside the beehive. Before shaking, make sure to spray more sugar syrup so that the bees stays together.
- After several gentle shakes, when most of the bees are inside the hive, you can bump the package so that the bees come to the middle of the box.
- After a few bumps and shaking, the bees that were in the inner body of the package box will come out and be pushed to the beehive.
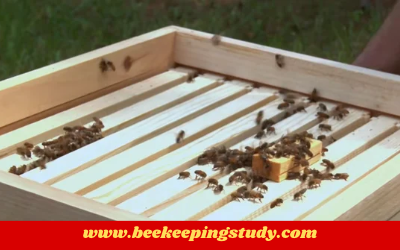
You might lose some of the bees, but don’t worry about them at all. When you have most of them inside the beehive safely, this indicates the package of bees installation was successful.
After having most of the bees inside, put those 3 frames back in the middle and close the inner cover and telescopic cover. Keep the hive closed for at least 4 days without any interruption.
What About the Remaining Bees?
The remaining bees that are swinging around or left inside the package are not thrown away. Just place the box in front of the entrance of the beehive. Make sure the box’s open area is placed facing the entrance of the beehive.
Within a few hours to a day, most of the remaining bees will go inside the hive on their own.
The Job is Not Done Yet
You have transferred the queen and workers and closed the beehive. If you think your job is done, you are wrong.
The colony members are not united yet. There is a high chance that they can get robbed or attacked by parasites.
To protect against robbing and protect the colony from beetles, mites, and moths, reduce the entrance. The best way is to place an entrance reducer in front of the entrance of the beehive.
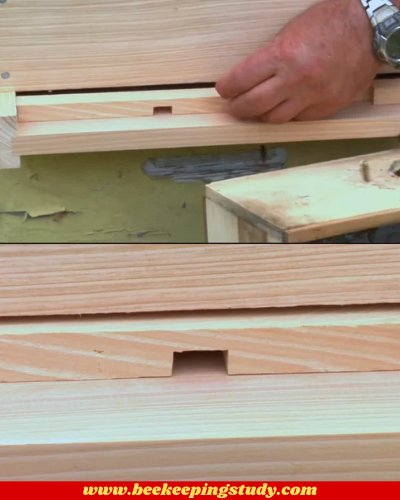
The entrance reducer has 2 openings: one is a large opening, and the other is a small opening. For package bee installation into a beehive, make sure to use the small opening. Just slide it inside the beehive entrance.
If you reached this point, then congratulations! You have successfully installed a package bees to a full sized beehive.
Post-Installation Care for The Bees
Your job is not done until the bees accept the queen and start filling the comb. So, after installing the package of bees into a full-sized beehive, you have to take proper care of the hive.
Here is the checklist for post-installation care for the bees.
- Day 1 to 4: Don’t open the hive; keep the hive closed and only provide proper sugar syrup. This is to allow the workers to release the queen on their own.
- Day 5: Open the Hive and check if the queen is released by the workers. If not, add one frame of eggs and young larvae to the hive. Then give the workers another 2 days to accept the queen.
- Day 7: If the queen is not released by the worker it’s time to do it by yourself.
- Week 1 to 3: This is the heavy feeding time. Feed the bees with 1:1 sugar syrup heavily in these days.
- At the 3rd Week: Look for frames containing eggs and larvae. If available this means the queen is got accepted and the colony is developing.
Note: If during the period the queen bee is found dead, consult with the seller and order another queen bee immediately.
If you notice any population decline within 3 weeks, don’t panic! The eggs and larvae will take up to 21 days to develop. In the meantime, worker bees can die, resulting in population decline.
Mistakes to Avoid Regarding Using a Package of Bees
Different beekeepers can have different opinions regarding what is the right method and what is wrong. You can follow your local expert beekeeper’s guide while installing a package of bees into a beehive.
I talked with several beekeepers in the US. They mentioned several common mistakes beginners make in this regard. So, I am sharing Dos and Don’ts regarding installing a package of bees into a beehive.
What to Ask the Seller
Before purchasing the package of bees, you must clarify several points with the seller. Then, based on your preference and beekeeping goal, decide whether you should purchase that package or not.
Here are the mandatory questions to ask the seller.
- Is the Queen Marked?
- Do you raise your own queens, or do you buy them from someone else?
- What breed or strain are the bees?
- Is the queen mated, proven, or virgin?
- Naturally mated or inseminated?
- How long does the queen lay before you cage her?
- Is your stock bred for mite or disease resistance?
- How do you manage mites and diseases?
- Are packages treated before shipping?
- What kind of queen cage do you use?
- Does it have a candy plug?
- What does your queen guarantee cover?
- What’s your deposit and cancellation policy?
Dos & Don’ts During Package Installation
After getting the package, during installation, people often make several mistakes. From my observation and gathered knowledge so far, you should avoid these to stay on the safe side.
- Install the package as soon as you receive it. Don’t wait more than 48 hours before installation.
- Don’t open the candy and release the queen on the first day.
- Don’t open the cork on the opposite side of the candy plug.
- Try not to keep the package outside the temperature range of 50 – 70°F.
- Do not add a second deep box until the bees have drawn out 7 of the 10 frames.
- Don’t use a smoker, as the bees aren’t defensive.